Table of Contents
Define a Process Architecture
Process Architecture is the hierarchal design of the processes. As the business undergoes changes and processes become more complex, a strong process architecture ensures that processes remain in their optimal state. Organizational strategy, structure, process ownership, and program portfolio are some of the key considerations that go into defining the architecture.
In Stages, since each of the processes resides in its own workspace, process architecture is represented by the hierarchy of the workspaces. Before integrating it into the next process in the hierarchy, it is recommended that each process should be baselined (versioned) and only the valid version of the process should be integrated.

Above is an example of process architecture. Elements like phases & milestones or value streams have cross-process validity. They are defined in a workspace called ‘Lifecycle Management’. The other process areas directly interface with elements in this workspace, e.g. associating work products with milestones.
Furthermore, all the process areas (including Lifecycle Management) are integrated into a single Standard Process workspace called ‘Software Engineering’ which contains all their process elements (workflows, activities, roles, phases & milestones, work products, and guidance).
In the final layer, specific programs have been instantiated from the ‘Software Engineering’ workspace. This is done by first integrating the ‘Software Engineering’ process into the Program workspaces and later tailoring each of the Programs.
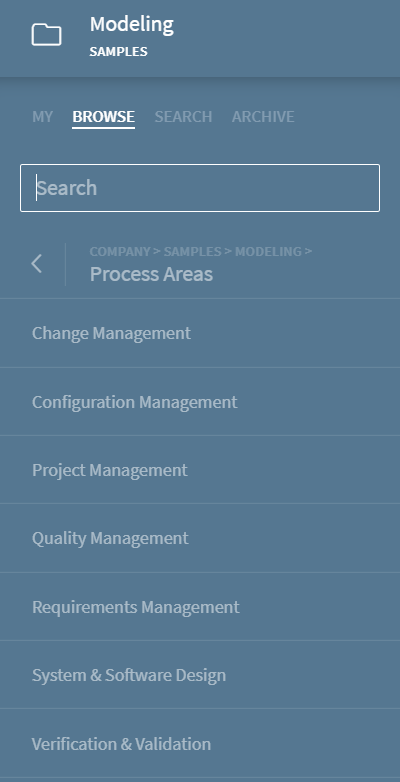
Below we see how the Process Areas defined in the above example would show as workspaces in Stages.
Integrate Processes
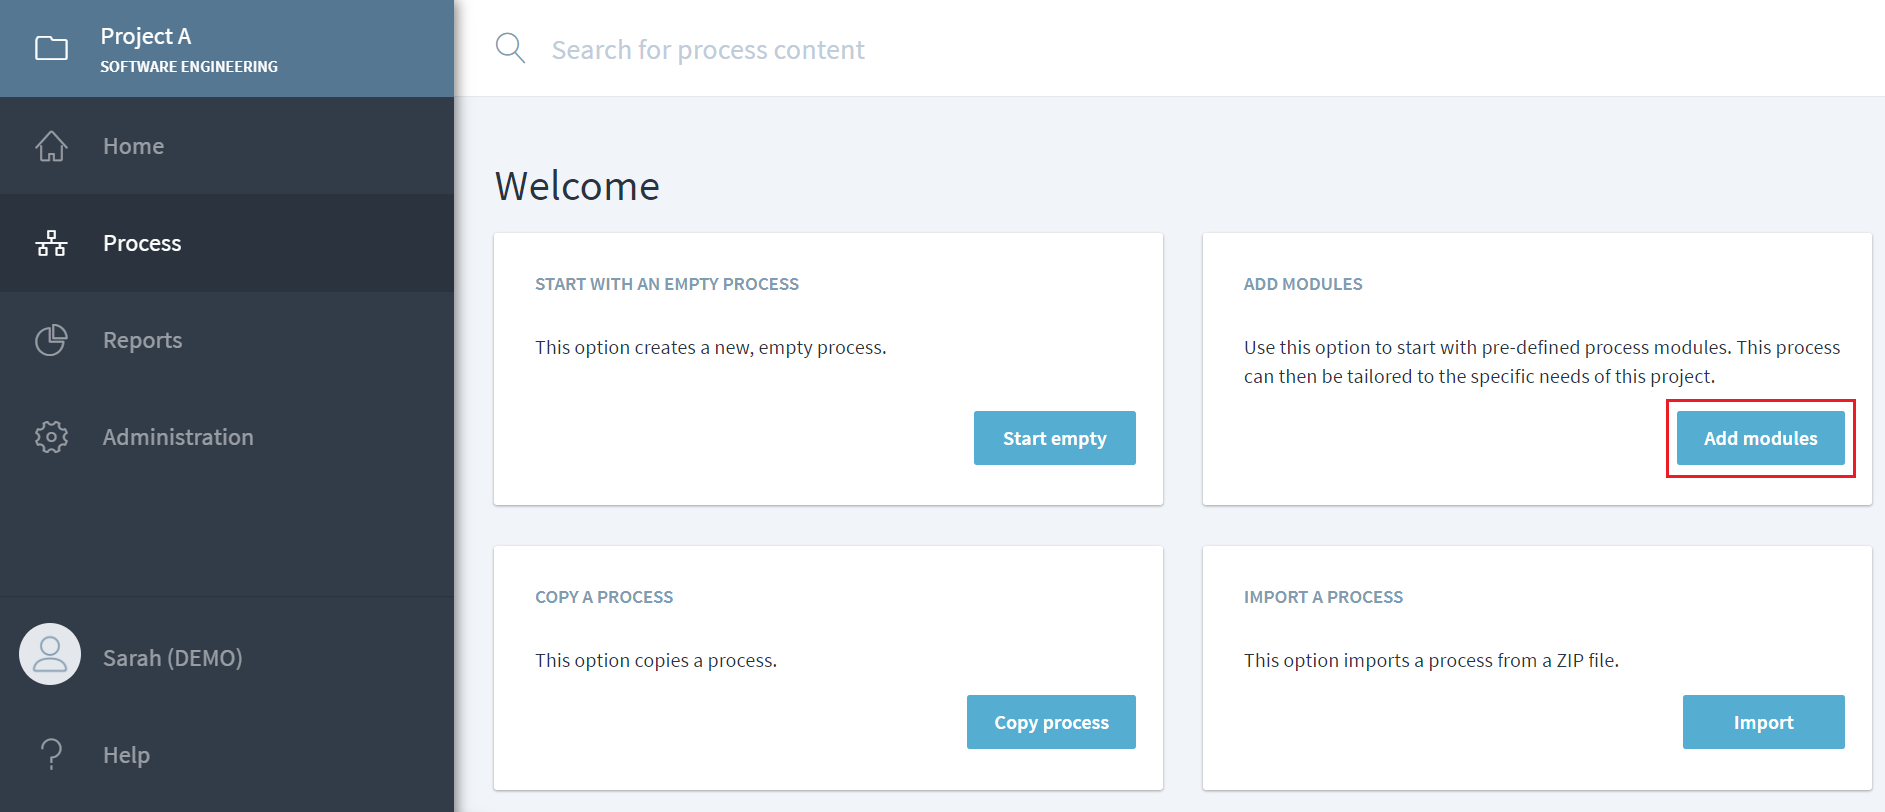
To integrate a process into the next level, use the option Add module on the Process start page. In our example, once the Software Engineering workspace is created, all the process areas are added at one go by using the Add module option. The recommended practice is to select the valid version of the processes to be added.
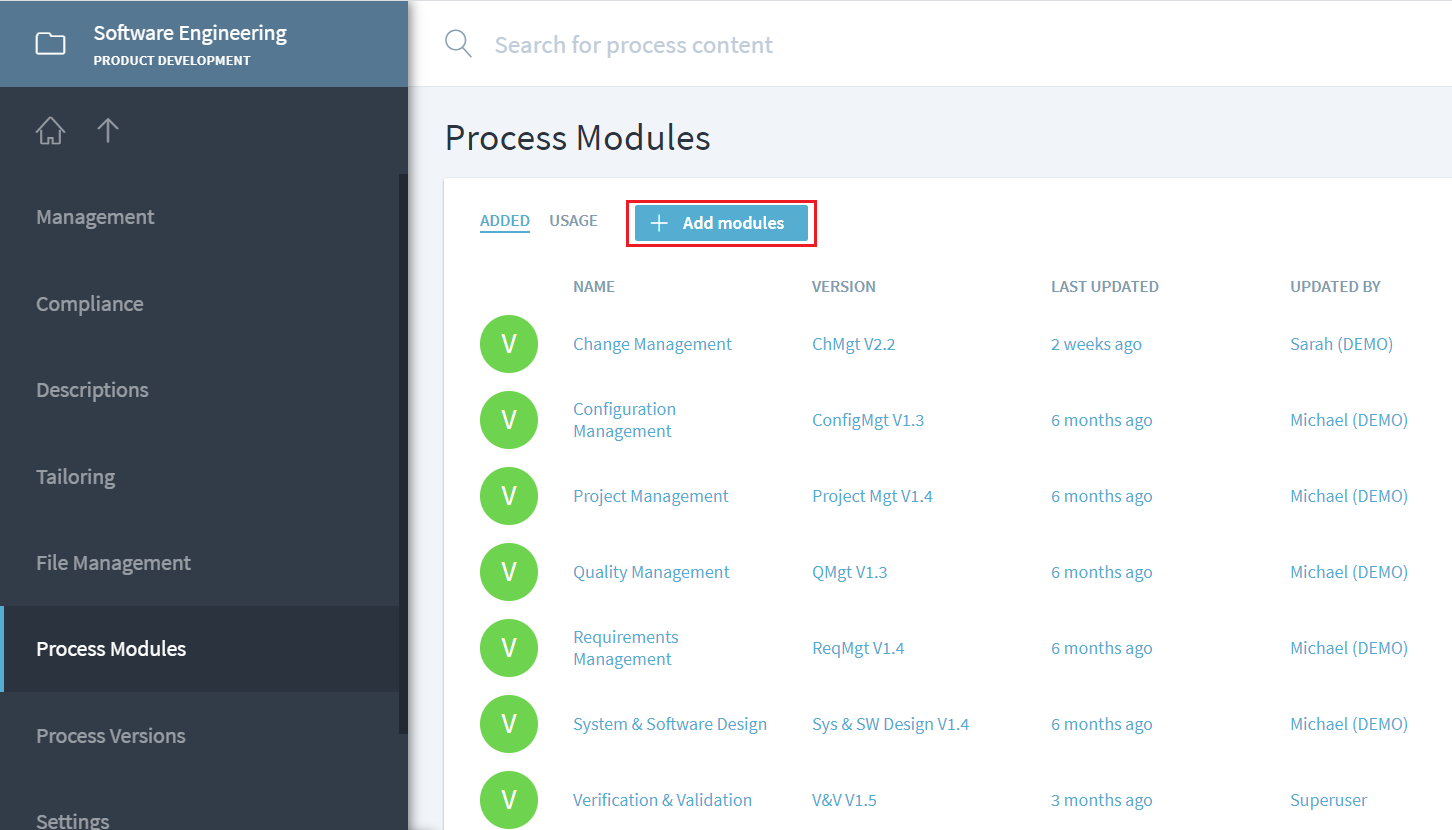
For any existing workspace, more modules can be added by navigating to Management>Process Modules and clicking or tapping on Add Module.
Update an Integrated Process
Once a valid version of a process module has been released, the processes where it is integrated needs to be manually updated to consume the valid version.
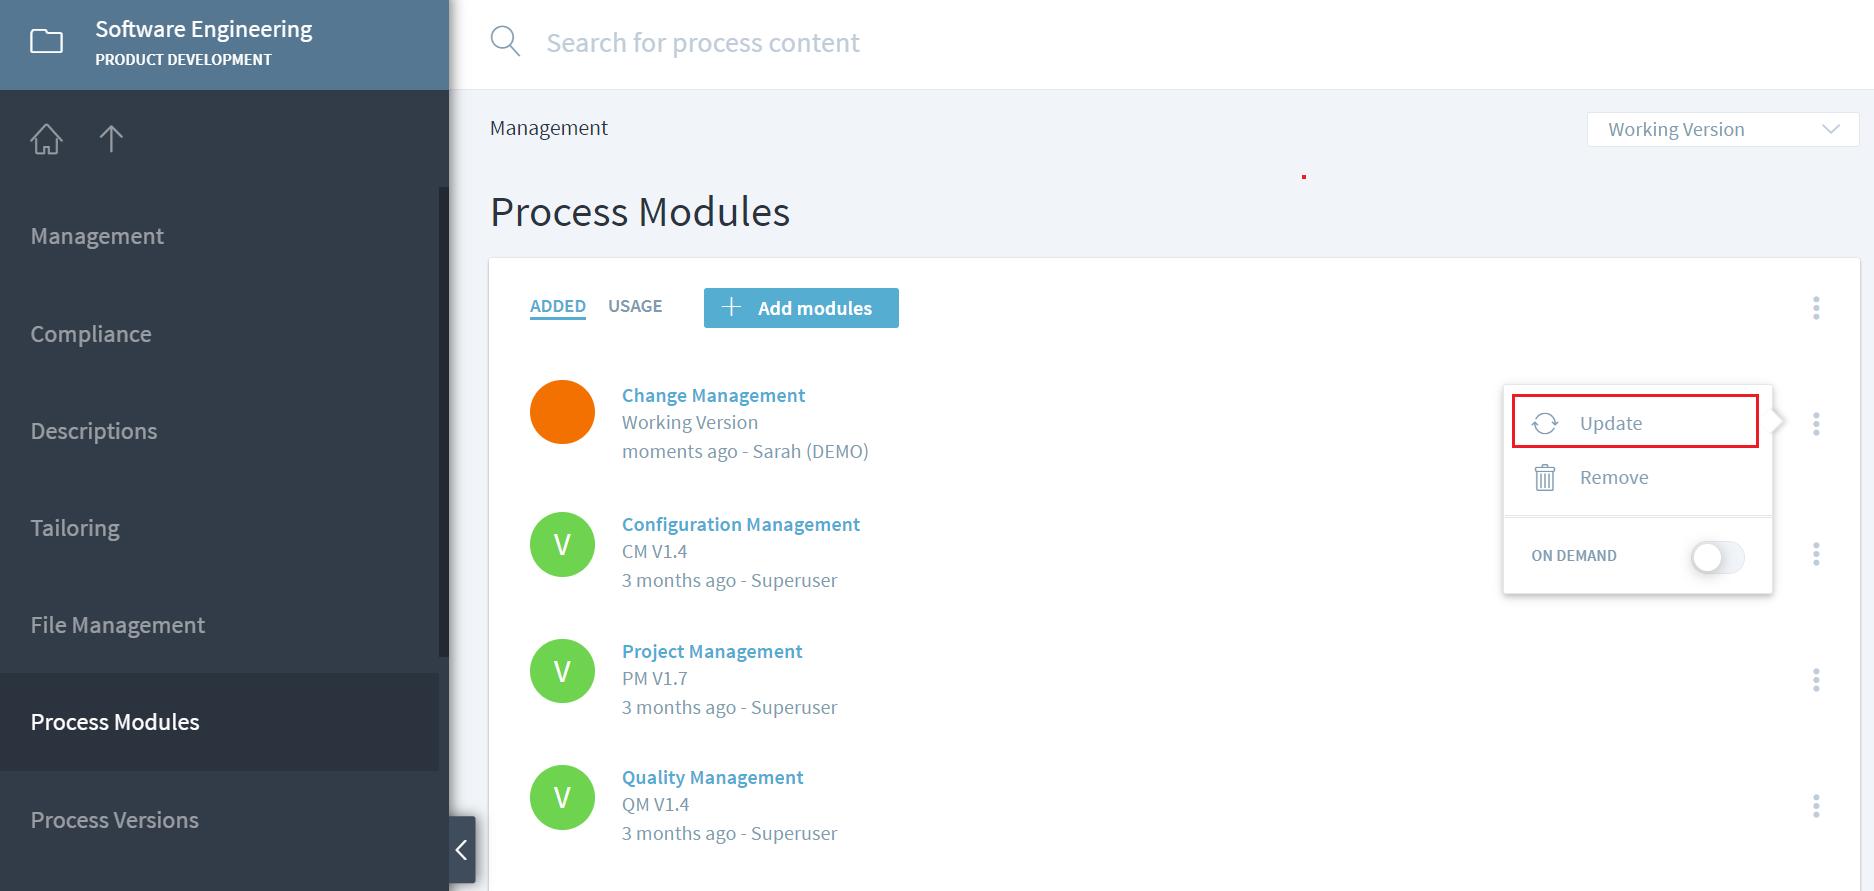
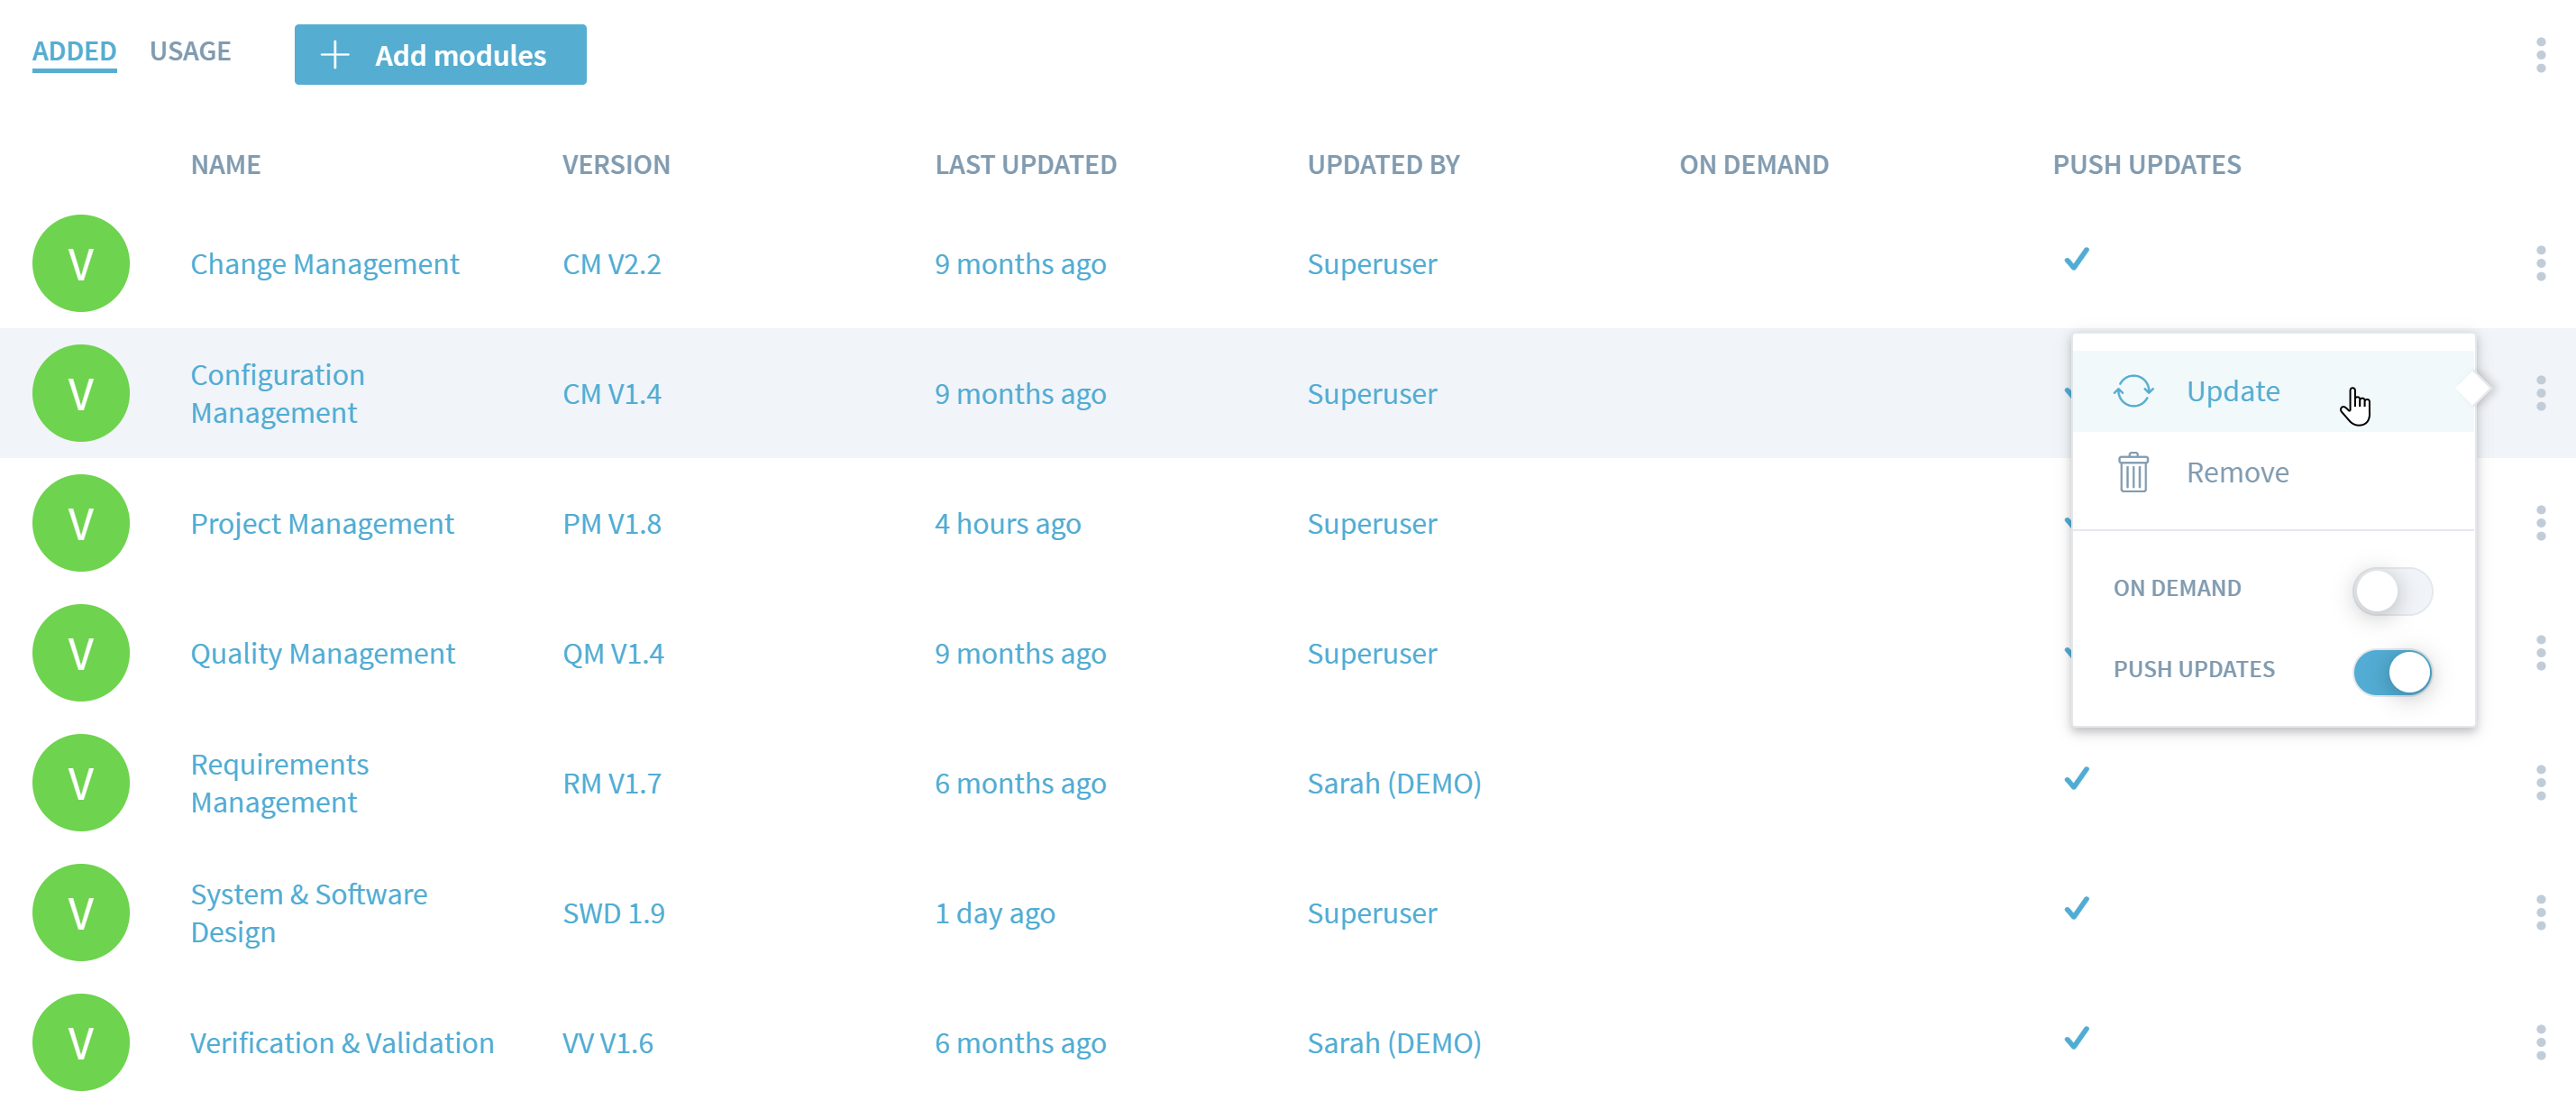
Navigate to Management > Process Modules of the integrated workspace and select Update. Once the valid version is updated, the circular orange icon changes to green with a ‘V’ in it.
Multiple modules can be updated within one action by using the … menu in the top right and then selecting Update.
A module can also be removed from an integrated process by selecting the Remove operation. This will remove the inherited process elements of the selected module from the integrated process workspace.
Update several Modules via Push
The update also works in the other direction. If a module was integrated and “Push Updates” has been enabled for it either during the integration or later on in the module's properties, a module update can also be pushed from the source to the target.
To push a process module into all workspaces that have the module imported and push-update enabled, go to Management > Process Modules and select the Usage tab. Then select the version to be pushed and click or tap on the Update icon. To select multiple modules at once, use the … > Update menu and check the respective selection boxes.
Interpret Update Warnings and Refresh Versions
In some cases, module updates show certain warnings. There are two typical causes for those:
1. Changes to the process metamodel.
If types, associations, or attributes have been renamed or deleted in the metamodel, the respective data might still be present in the database. In case of an update, a warning is being created. Those can typically be ignored.
2. Interfaces between modules
If two modules are integrated that have interfaces between each other, the integration of the first module will cause warnings, because the targets of the interfaces could not be found. As soon as the second module is integrated, the interfaces will be correctly created.
Nevertheless, the warnings from the first module intergration will still be shown.
The solution is to update the first module to the same version again:
If the interface is still present in the second module, the warnings will go away.
Use Workspace Collections to control Process Interfaces
More complex projects and programs are best instantiated as multiple workspaces. For example, a program following a scaled agile approach would have one portfolio workspace, several workspaces for the different products or systems, and then subsequent workspaces for each sub-system, component, or team. Of course, this whole workspace hierarchy should be connected via the correct interfaces.
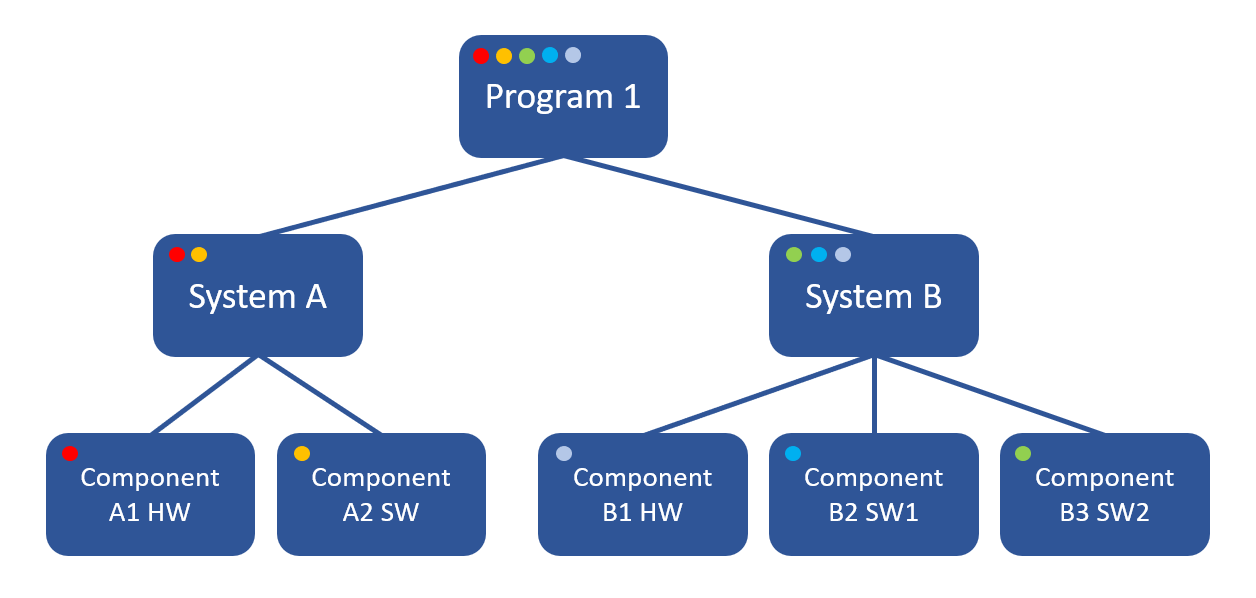
In the image below, “Program A” needs to have interfaces with “Component A1 Hardware” and “Component A2 Software”, but not “Component B1 Hardware”, “Component B2 Software”, or “Component B3 Software”, even if the same process modules are integrated there.
The above structure can be correctly instantiated by using workspaces collections to control the creation of interfaces. By creating workspace collections depicted by the colored dots in the image above, the interfaces will be correctly created, because all workspaces within all collections of the current workspace are being searched for interface candidates. The interface search uses internal identifiers instead of just names, which makes it very robust and allows the workspaces to have arbitrary names.
In addition, this allows the same process module to be integrated into different workspaces with different tailorings. For example, the “Component B2 Software” and “Component B3 Software” workspaces can have the same software development process module integrated but might have different tailorings or even different versions of the same module, and it will correctly interface with its parent “Program B” workspace.
Finally, those workspace collections will always show the end users the expected search results, when the search scope “Recommended Workspaces” is being used.
