Table of Contents
Work with files
In an instantiated project or a program, specific deliverables are consumed as well generated during the execution of an activity. These deliverables files are part of the work product which has further information like description, guidance, milestone and activity or workflow where it is used as input or output.
Though the work product is modeled in Stages, the files are stored in the configuration management system (CM) like Subversion or SharePoint. Users can avail some of the CM features from Stages itself. For example, users can check in and check out the document in Stages to lock the file while editing to avoid overlapping edits. They can also check the version history and change state of the file in Stages.
Adding a new file or links
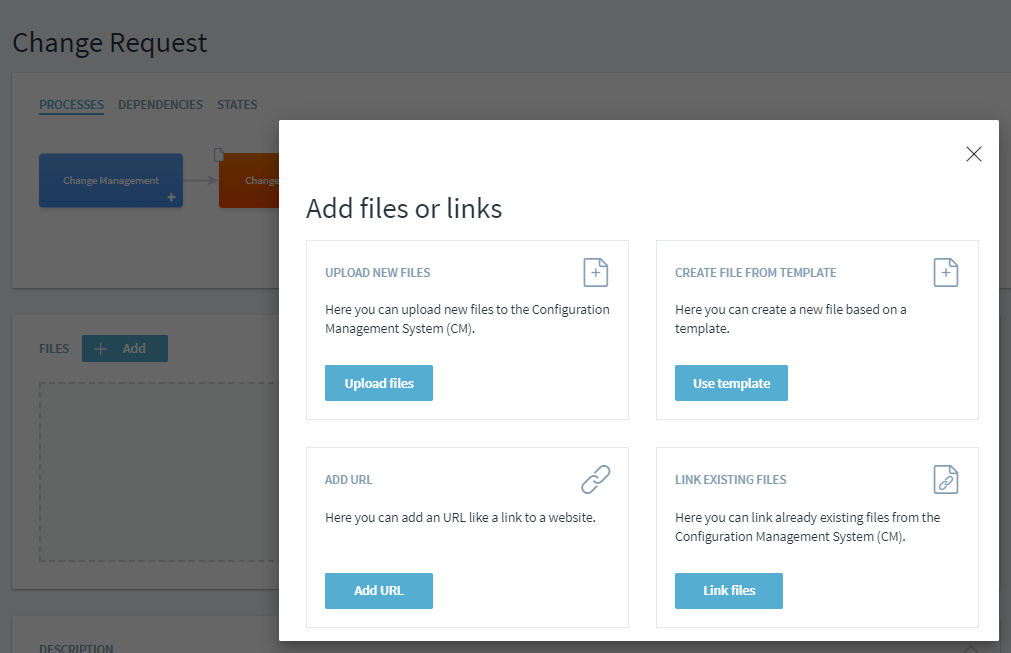
Stages provides multiple ways to add files or links to a work product.
- Uploading a new file
- Using a template to add a new file
- Adding a URL
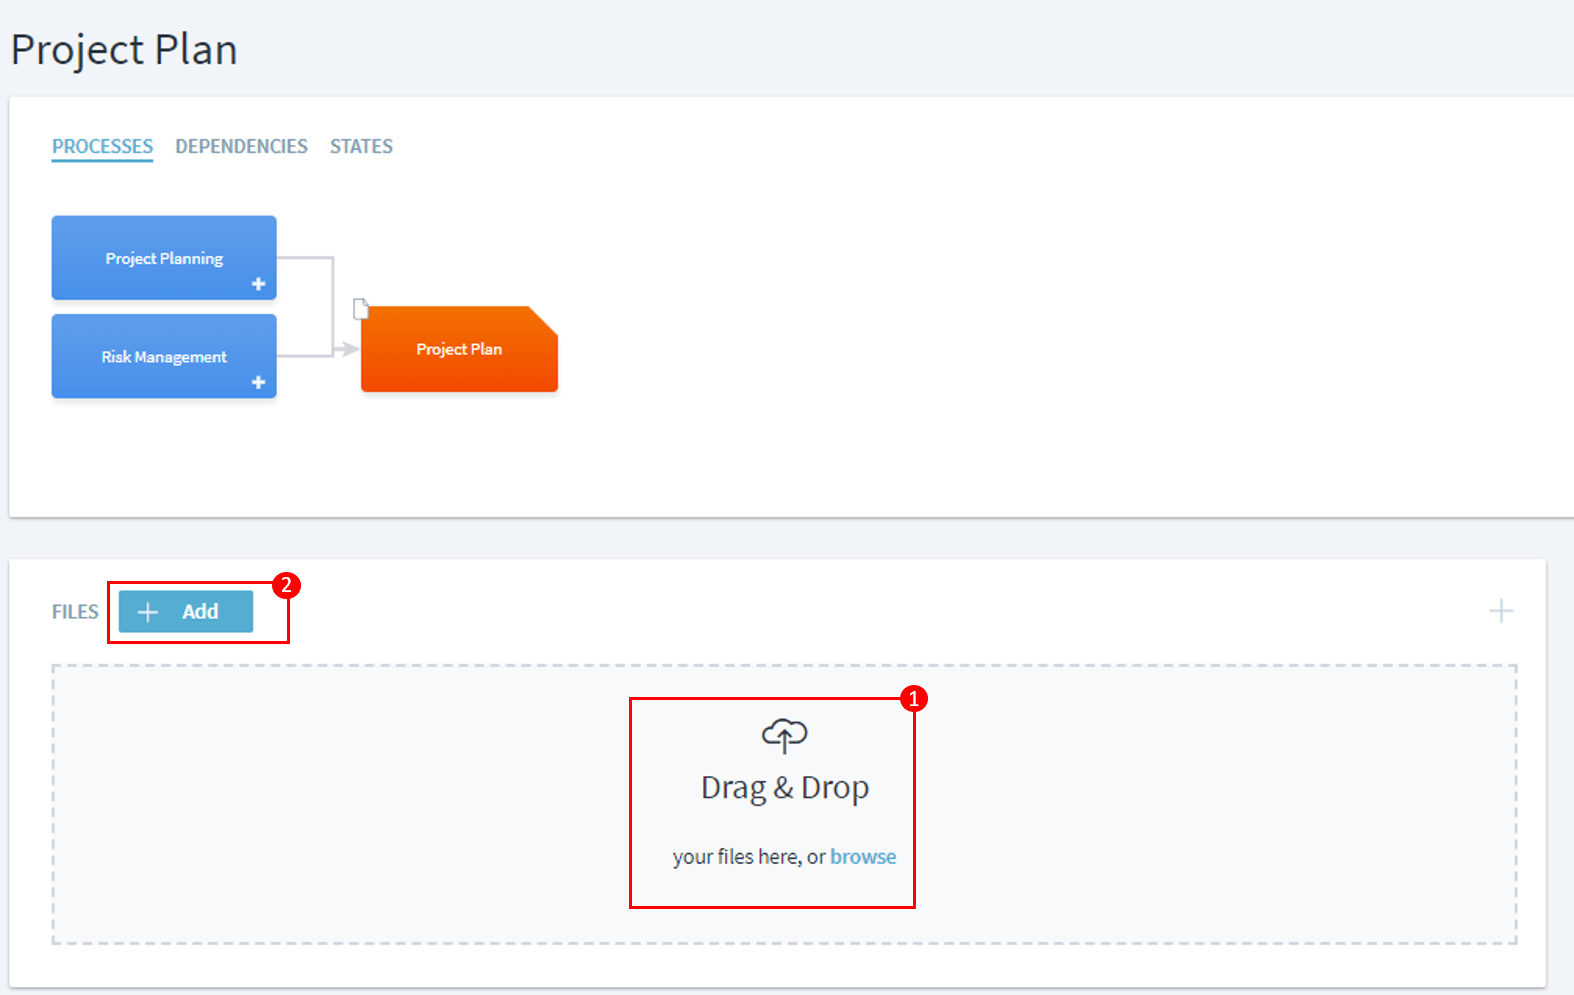
1. Uploading a new file: Easiest way to add a new file is by using the drag & drop function or browsing to the folder (1) and uploading the file. Alternatively, user can click on Add (2) and select the upload file from the widget. This uploads the file to configuration management system linked to Stages.
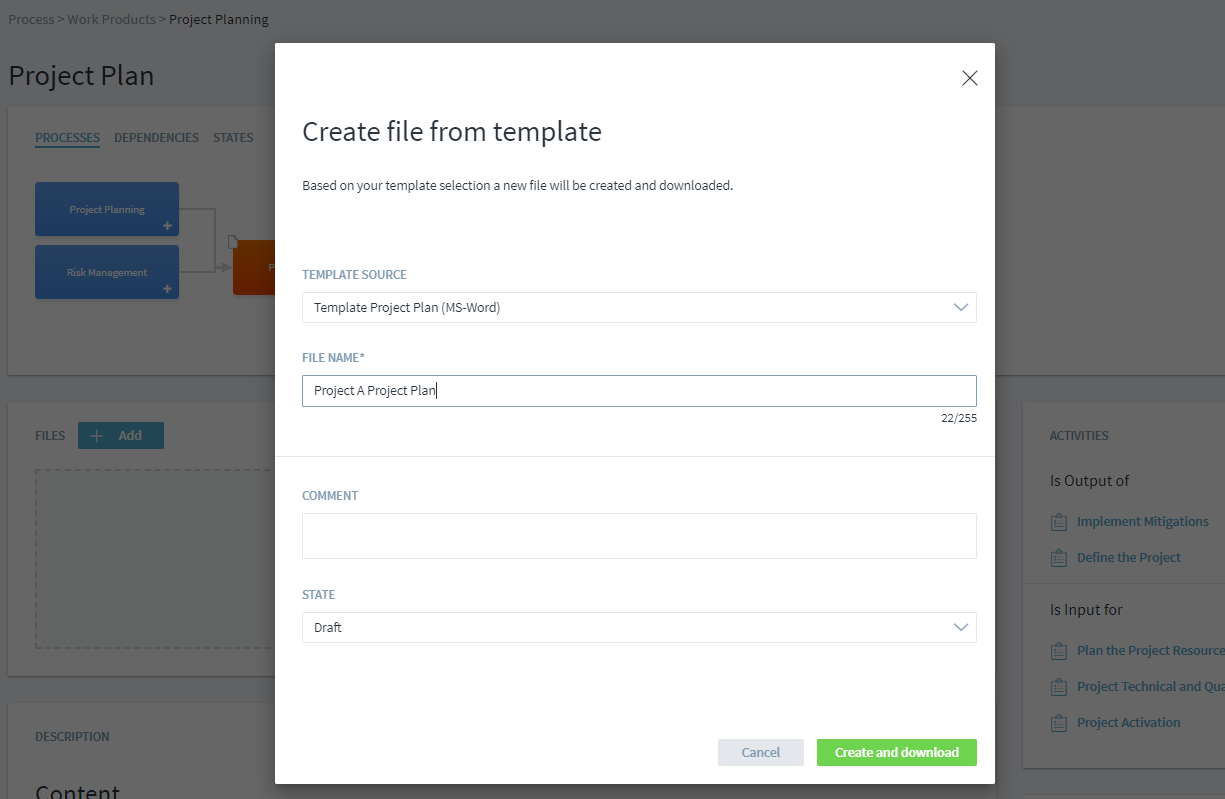
2. Using a template to add a new file: In Stages, files can also be created using a template and this file can then be added in work product. This simplifies document creation and also ensures consistency across the organization.
In order to use template, one should already be present in the guidance linked to the work product.
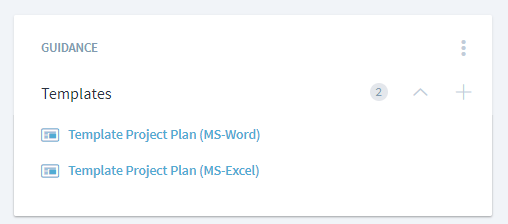 If a template is present in the
 guidance, it will be available to be used to create a new file from template and this will be stored in linked CM.
3. Adding a URL: User can simply be redirected to the webpage using the URL to access further details on the work product.
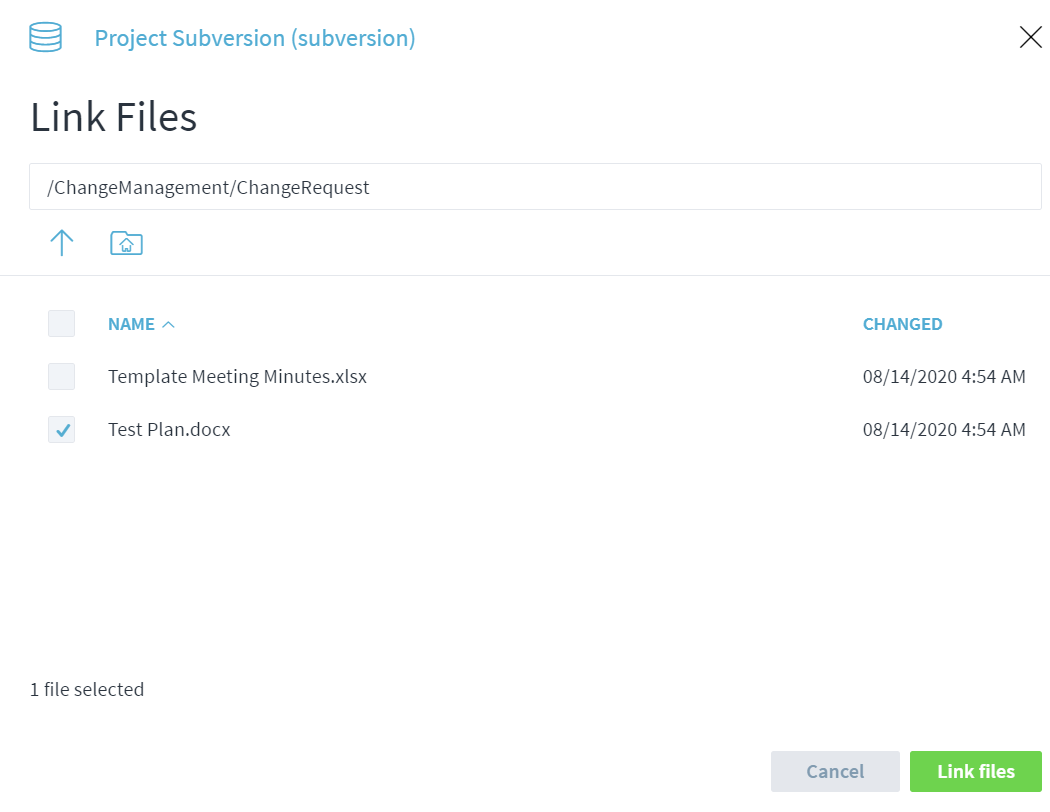
4. Linking to an existing file: CM system will have other files which can be linked by browsing and selecting the file to the work product. The linked file will have CM features of checking in and out, accessing version history available from the work product itself.
Checking in and out an existing file
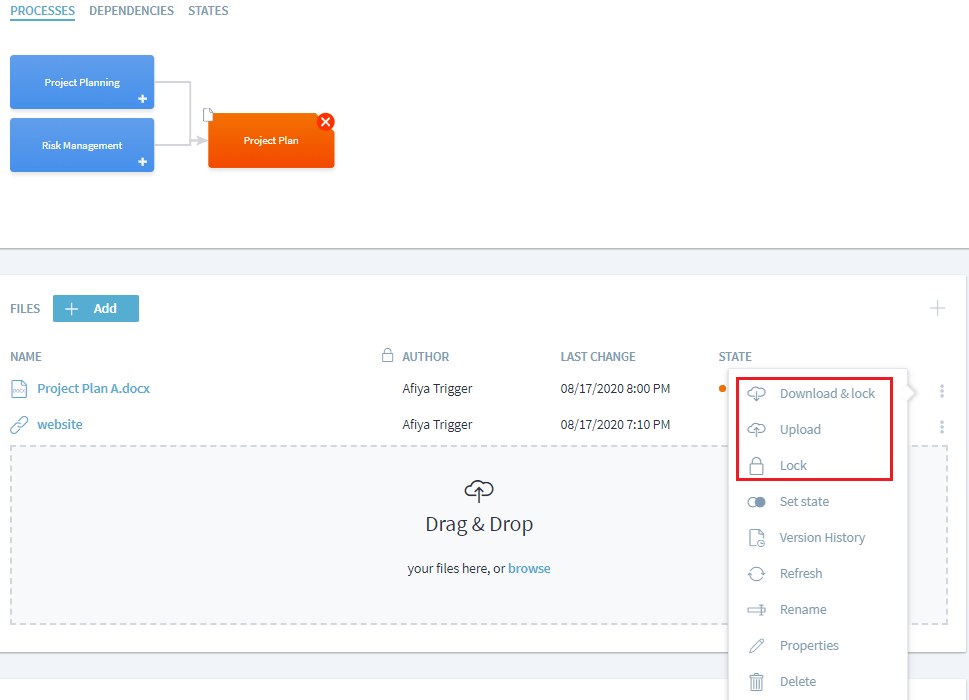
To work on an existing file, check it out by clicking on Download & lock. This will prevent another user from downloading or checking in another version of the file. Alternatively, you can simply Lock the file to prevent another user from editing the file.
Once you are ready to check-in the file, click on Upload to check in the new version of the file.
Setting State of a File
In different phases of product development, reviews play an important part in ensuring defects are caught at the earliest and to improve the quality of the end deliverables. Stages offers two default lifecycle review options: Simple Document Review and Mandatory Document Review. In addition, there is also an option to configure the review lifecycle to align with your own organization's document review lifecycle.
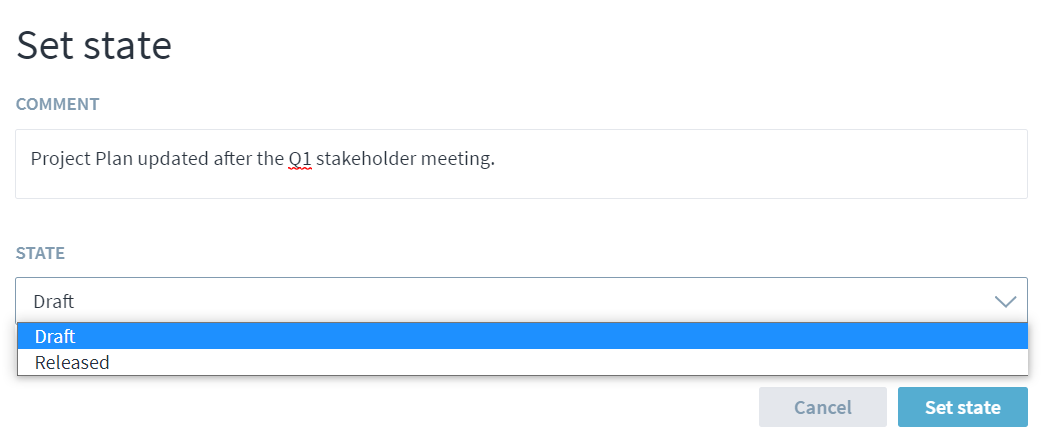
In Simple Document Review, the file can be promoted from draft to release state. However, Mandatory Document Review has an additional state called 'review' between draft and released state requiring mandatory formal review of the file.
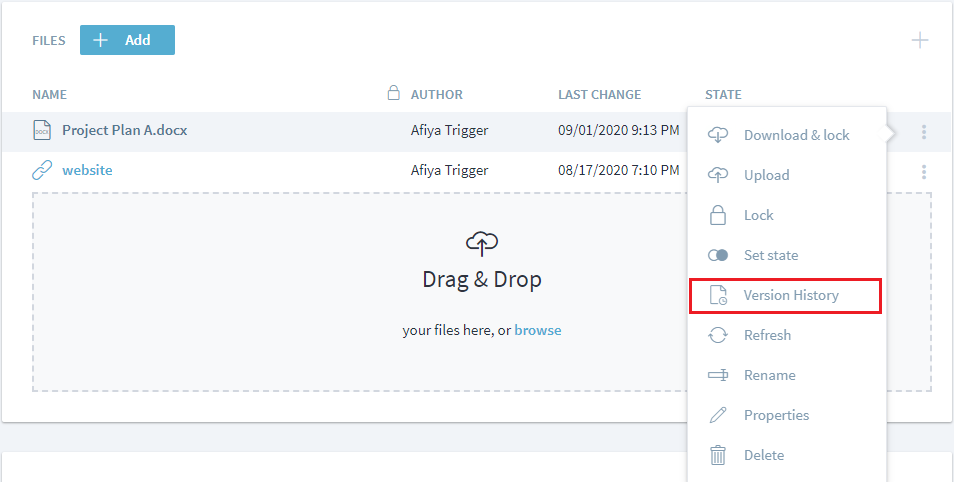
To set the state of the file, click on three dots next to the file name and select Set state.
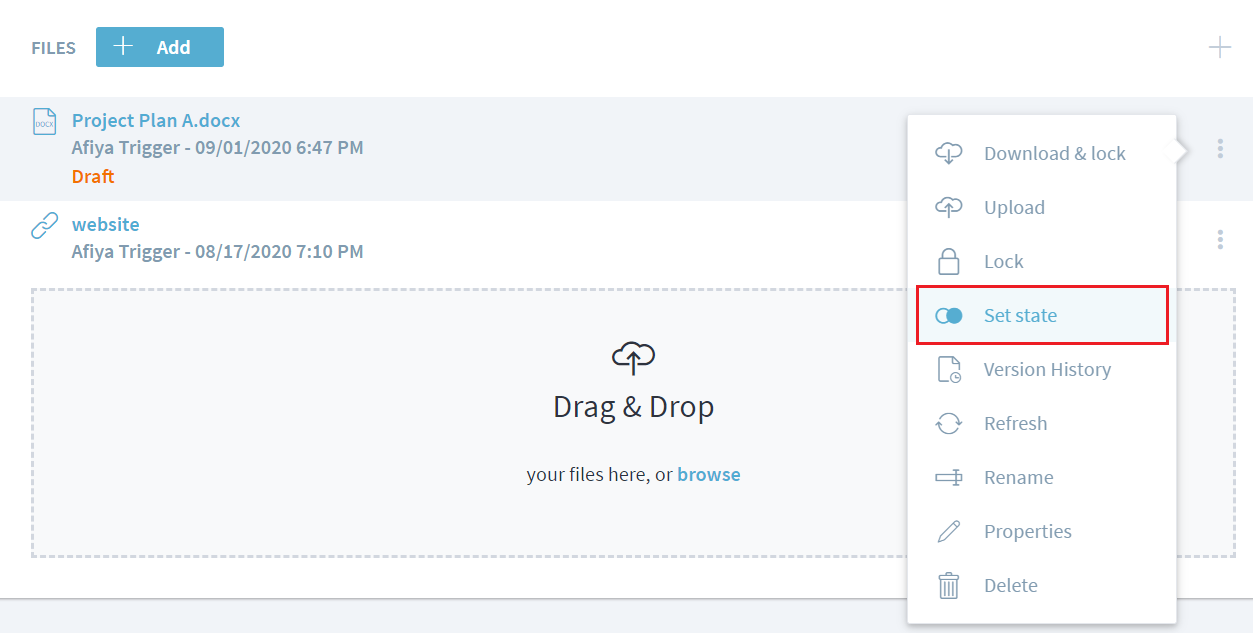
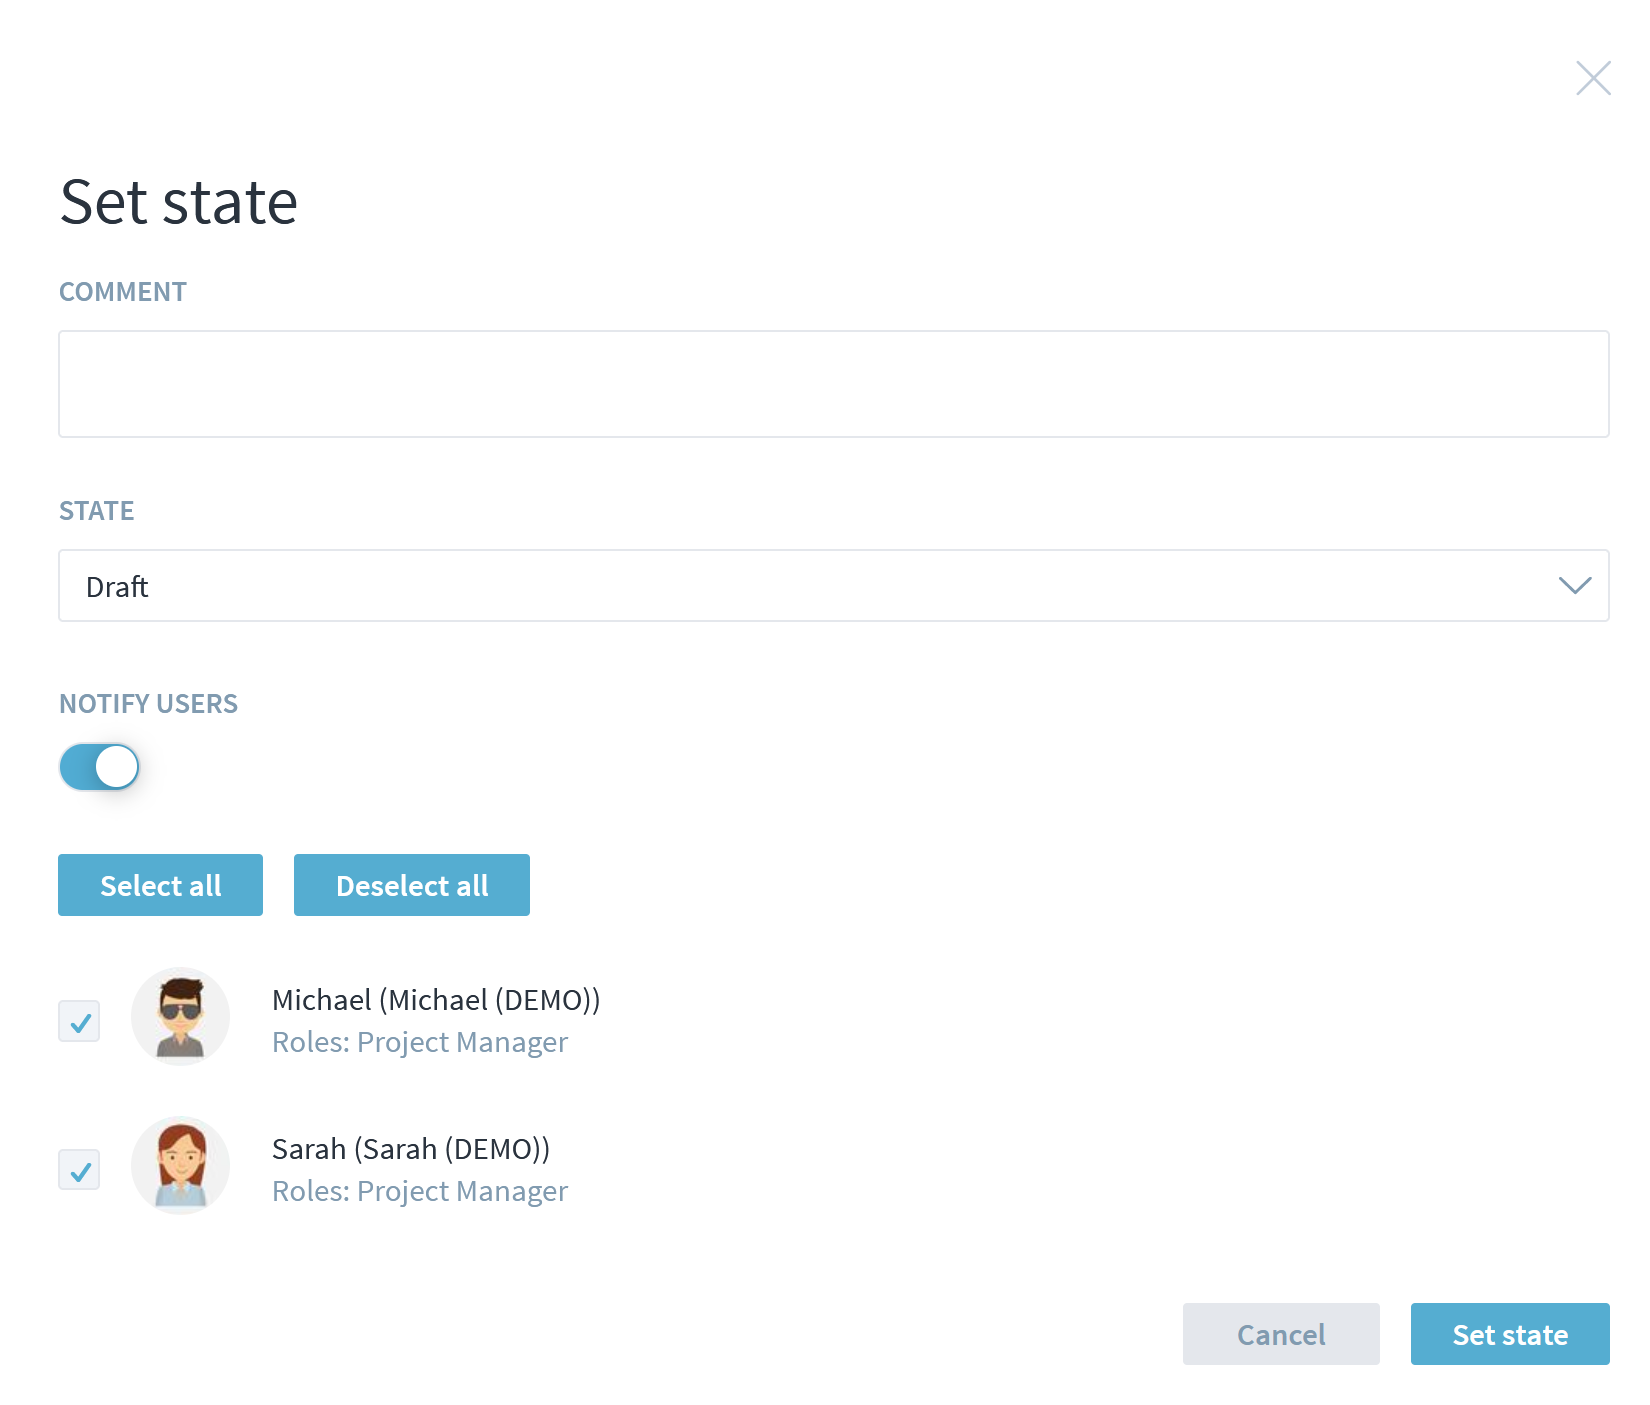
Set State to save the state. The options in the dropdown would depend on review lifecycle set by project manager.
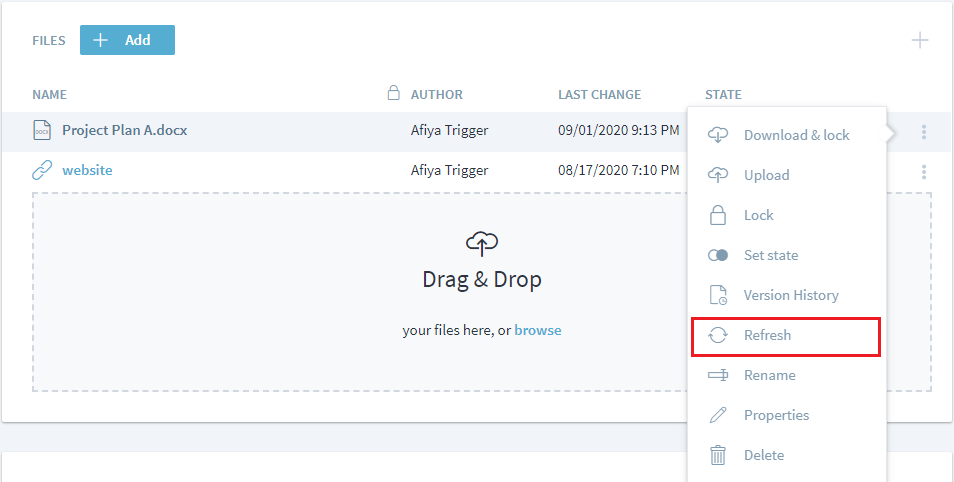
Once the state has been updated, the state icon on the work product will also get updated based on state of the file. In case there are multiple files, icon reflects the state of least mature file.
Notify other users about changes
Stages can automatically determine the users who should be notified about a new file version or modified state by analyzing the defined process.
By enabling the Notify Users switch, Stages displays the users that are assigned to roles of the activities that have the current work product as an input.
Please note that this functionality is only displayed, if an email notification server has been configured on the server.
Version History
Using the version history, user can check all the version of the file along with other information like state, author and date and download the previous version if needed. To access version history, click on the three dots and select Version History.
Click or tap on the version number to download that version of the file.
