Work with files
Stages supports you in your daily work, not only by providing process descriptions, but also by enabling you to gain rapid access to files. Via the Stages CM interface, it is possible to create, change and delete files.
Create a file in Stages
Carry out the following steps in order to create a logical file in Stages:
1. Go to your corresponding workspace and click on work products which is under the process object.
and click on the “Modeling Inputs ”work product“ which is created under the work products folder.
2. Click on the “Add” button or the ”+“ sign located in the right corner.
Select the “Upload files” icon under the Upload New Files display box, browse and the add the file.
A comment could also be entered while uploading the file. Once the file is uploaded from the system, select “Upload files”.
The File has now been created.
Alternately, the “Drag & Drop” feature can also be used to upload files.
3. Existing files from the Configuration Management system can also be linked to the ”work product“.
Click on the “Add” button or the ”+“ sign located in the right corner.
Select the “Link files” icon under the Link Existing Files database.
Choose the corresponding file under the process from the Sub Version and link files.
Change artifact instance attributes
The artifact instance attributes are mostly created automatically. To change an element artifact instance attribute carry out the following steps:
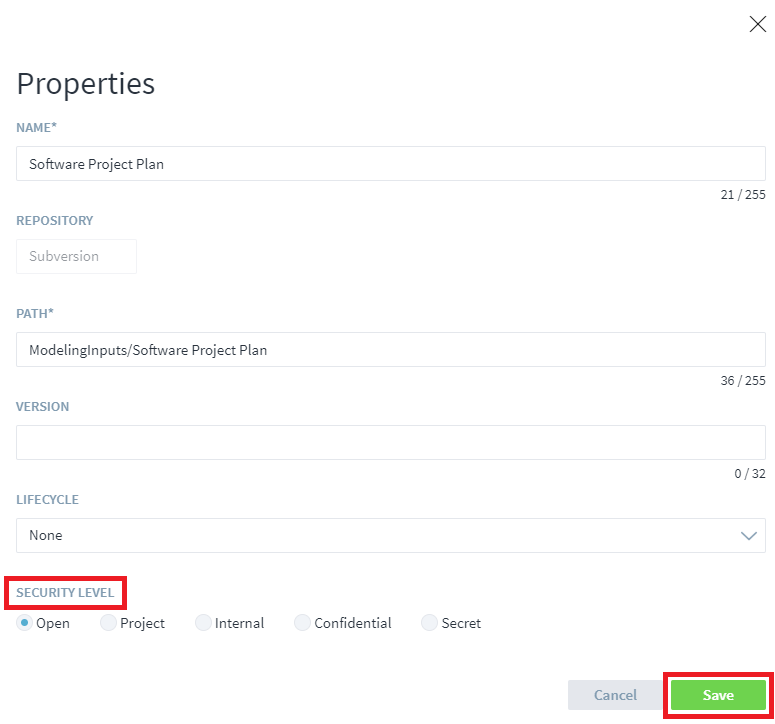
1. Click on the three dots corresponding to the file and select “Properties”.
2. Change the attributes and click on “Save” to confirm the changes, For example- The Security level can be changed to either Project, Internal, Confidential, Secret. Click on “Cancel” to go back to the unchanged artifact.
Managing document versions
Opening the current file
Carry out the following steps in order to download the current or fixed version of a file:
1. Navigate to a file which you want to download:
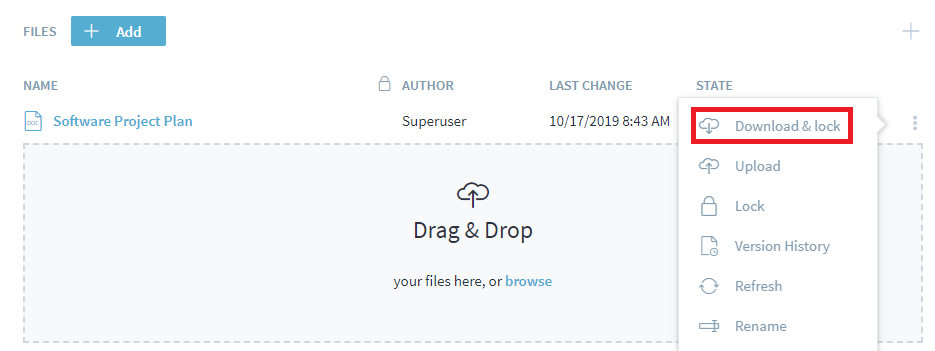
2. Click on the three dots corresponding to the file and select “Download & Lock”. By doing this action, the file gets downloaded and it is locked for editing.
Displaying the version history
Carry out the following steps in order to view the version history:
1. Navigate to the file:
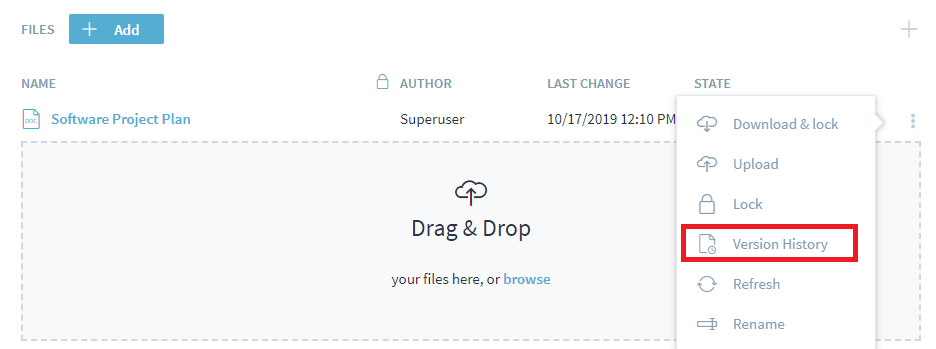
2. Click on the three dots corresponding to the file and select “Version History”.
A list will be shown of all the versions checked in to date together with the user and comment:
3. Open the desired version by clicking on the version number. The relevant version of the work product is opened.
Changing the State
Carry out the following steps in order to change the state.
1. Navigate to the file:
The file is now in “Draft” state.
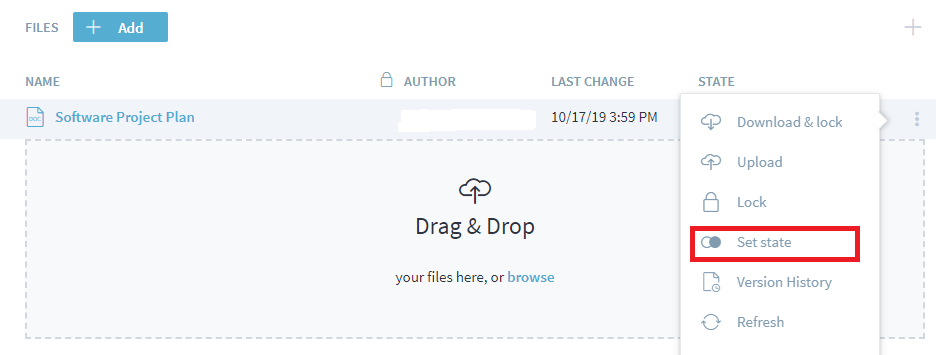
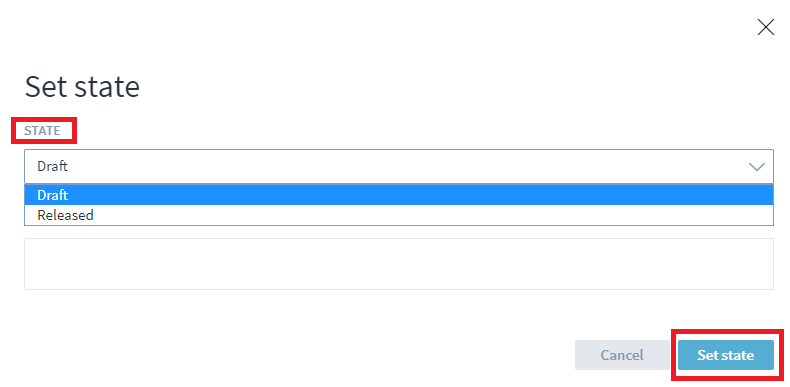
2. Click on the three dots that corresponding to the file and select “Set state”.
3. Select the desired state from the drop down. For example- The “released” state is selected. Click on “Set state”.
4. The state of the file is now changed from “Draft” to “Released”.
Editing files
Carry out the following steps for Editing files.
1. Navigate to the file:
2. Click on the three dots that corresponds to the file and select “Download & lock”. By doing this action, the file gets downloaded and it is locked for editing.
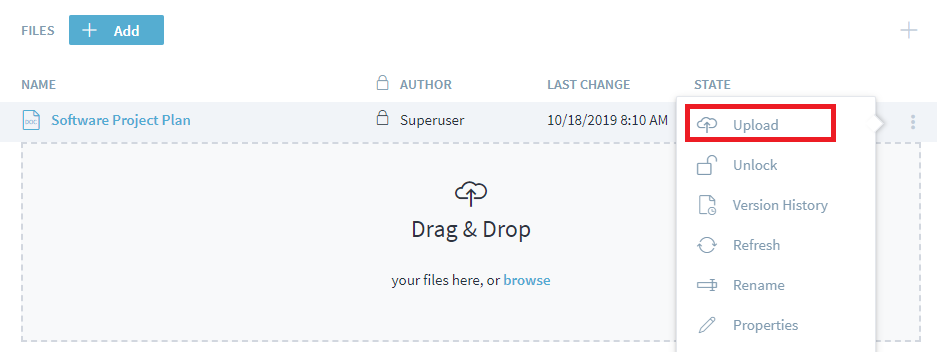
3. Make the changes to the file and save the file in your local hard drive. Navigate back to Stages, click on the three dots that corresponds to the file and select “Upload”.
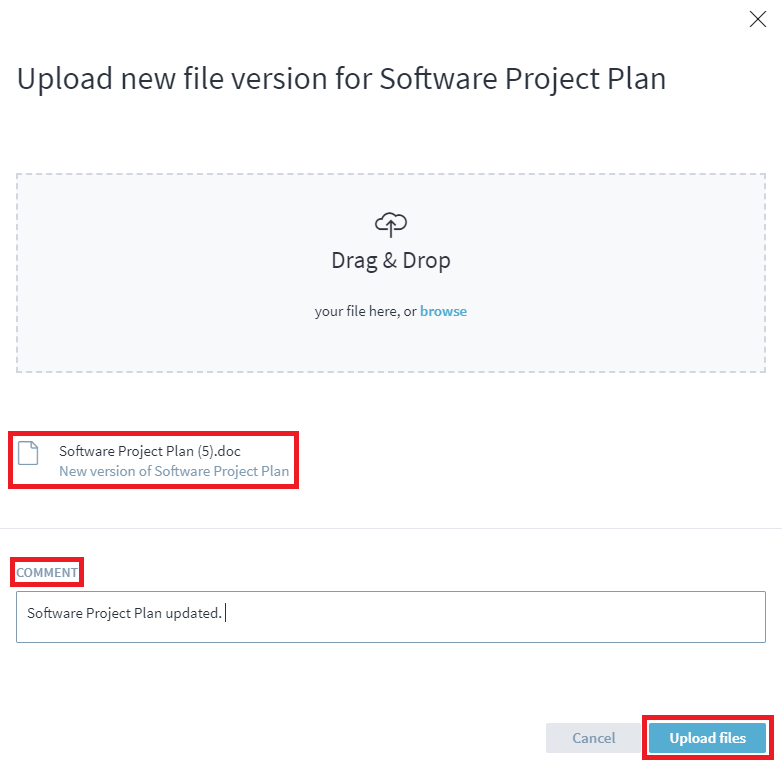
4. Upload the new file with the updated changes. Type in a comment and select “Upload files”.
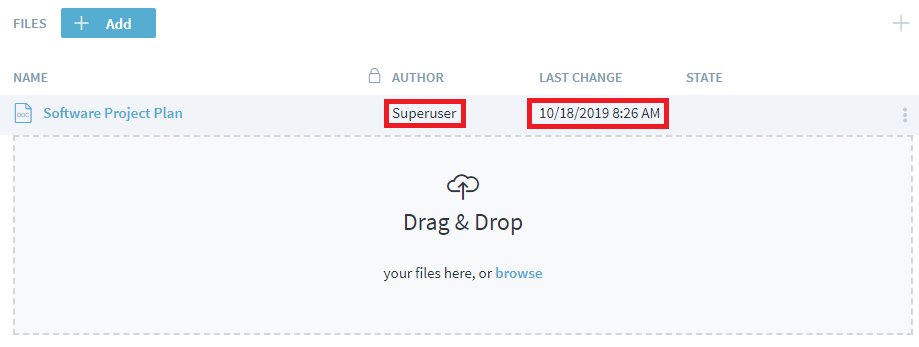
Once the file is uploaded, the “Lock” sign next to the “author” field is now gone and the “Last Change” field is also updated.
Renaming a file
Carry out the following steps for renaming files.
1. Navigate to the file:
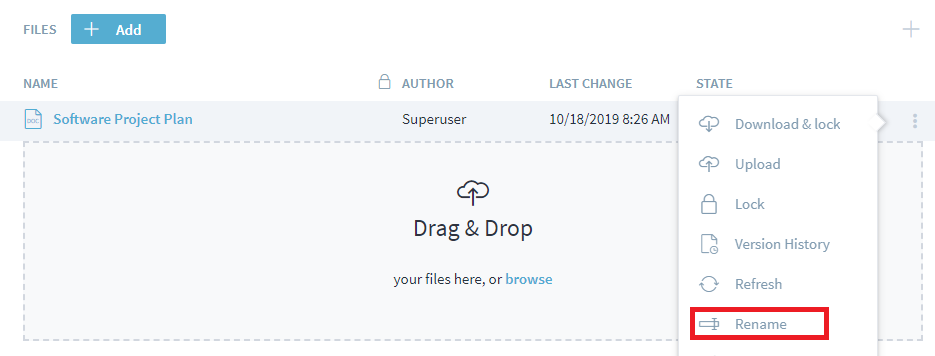
2. Click on the three dots that corresponds to the file and select “Rename”.
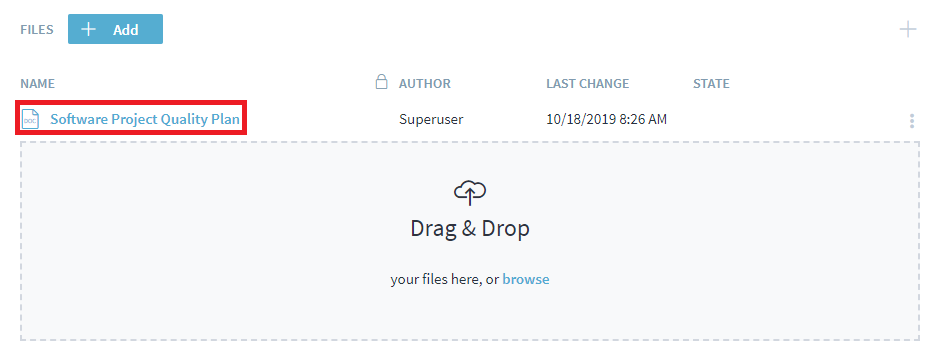
3. Type in the new name for the file. The filename is now changed from “Software Project Plan” to “Software Project Quality Plan”.
Deleting a file
If a file is no longer required, you can delete it as outlined in the following instructions. Carry out the following steps in order to delete a file:
1. Navigate to the file:
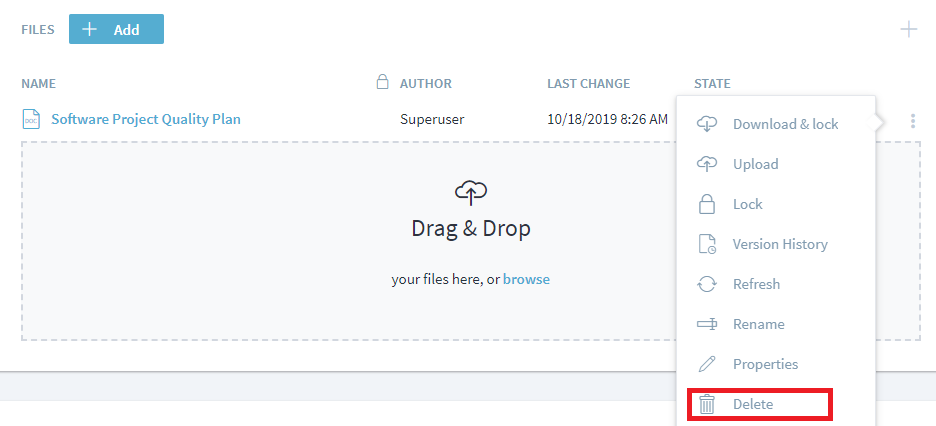
2. Click on the three dots that corresponds to the file and select “Delete”.
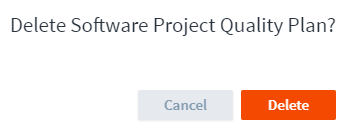
3. Confirm the deletion process by clicking on “Delete”.


