This is an old revision of the document!
Adding Clickable Images in Description
Clickable images are typically needed in landing pages or when you want to provide a visual map which can be clicked to take the user to a specific process element (like workflow, activity, guidance, etc.) in Stages or even an external weblink. Creating a clickable image involves two high level steps:
- uploading the image in a description box of desired location
- updating the image map by double-clicking on the image and copy-pasting the map information in this box.
Create a clickable image
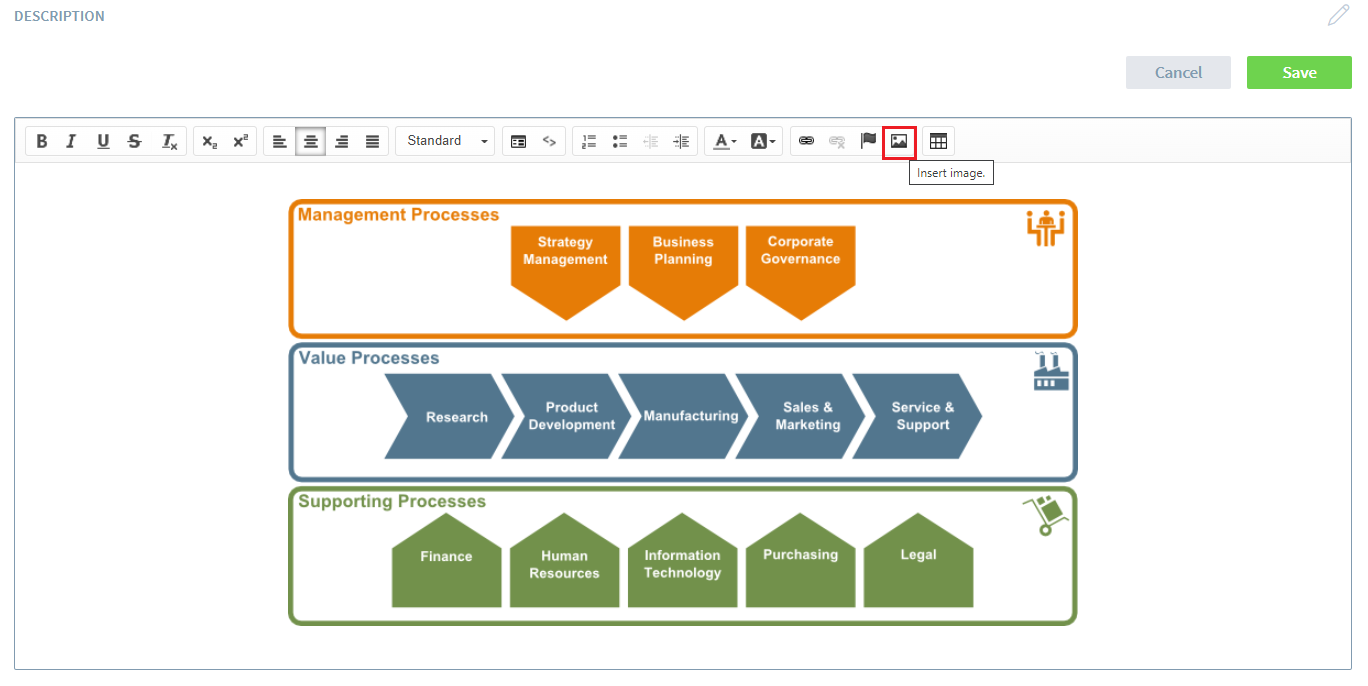
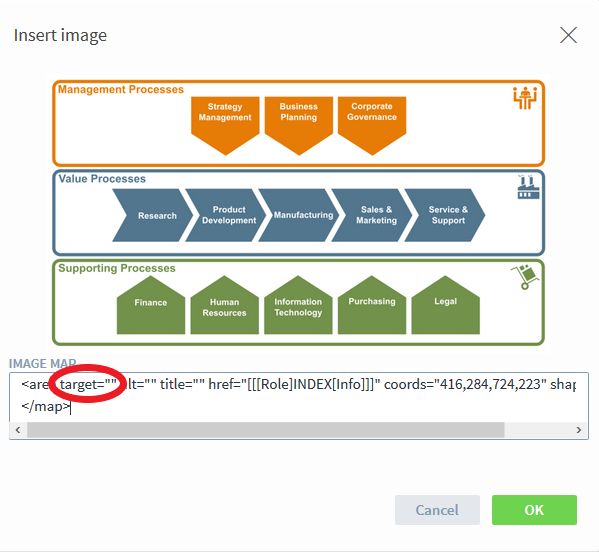
1. Upload the image in a description box of desired location. Click on the insert image icon and upload the image you want add clickable links to.
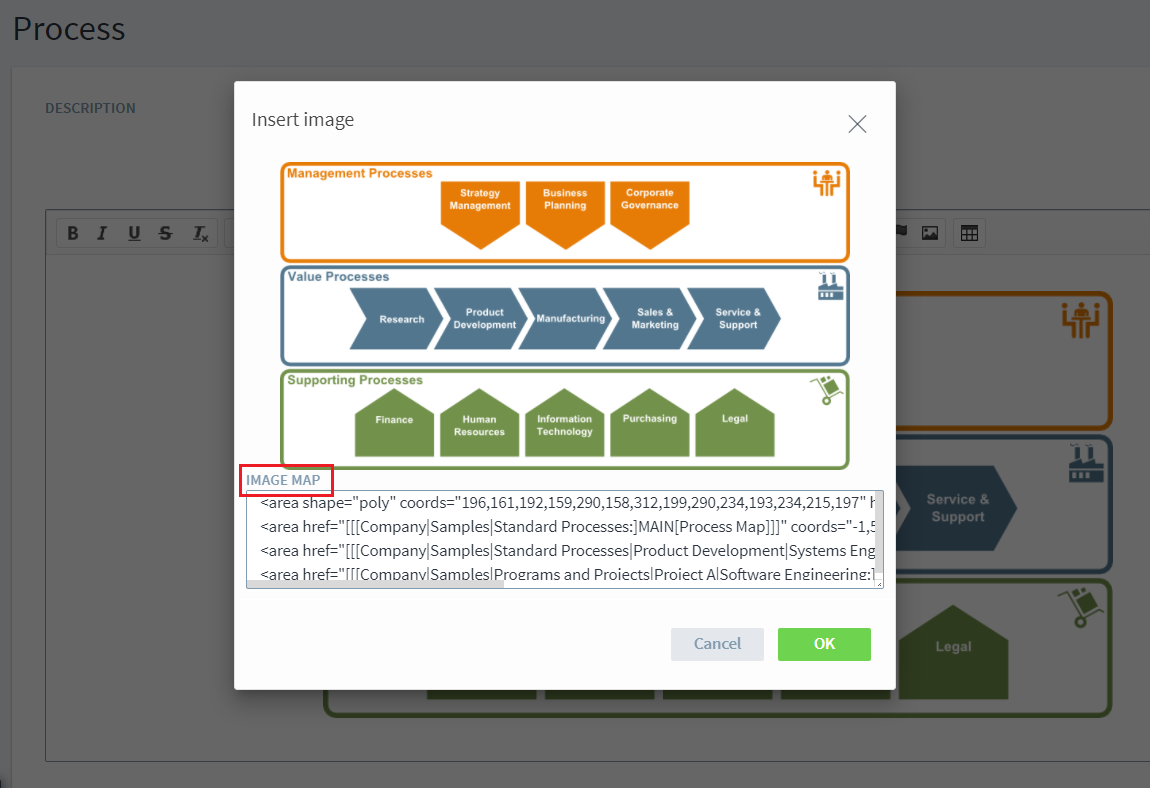
2. Update the image map by double-clicking on the image and copy-pasting the map information in this box. It is in this step, that you specify the areas in the image where a user would click to be taken to a specific link. In this example, when a user clicks on any of the areas like 'Model', 'Visualize & Plot', etc. he/she is taken to the link specific to that area.
Retreiving information to be pasted in this image map involves a few steps which have been described in next section.
Generate Image Map Information
A tool/website is required to generate image map information used in step 2 listed above. In this description the online image map generator image-map.net is used to create the image maps. You can also use your preferred solution.
Steps to generate Stages links
Firstly, stay in Stages and generate the list of all the links that you want user to be taken to on clicking image areas handy.
- Open the editor/description box and click on the chain-link icon
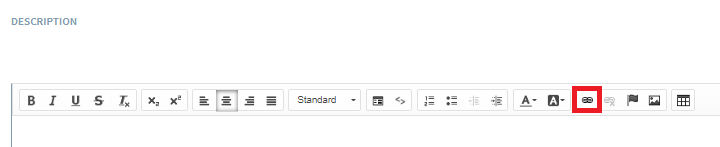
- Next, navigate to the element which you want to link with your clickable area. Copy the link into the clipboard. Repeat this step with all the links and save them in a clipboard. Note: Do not click on insert. Just copy on a clipboard/notepad.

Steps to work in Image map tool/website
With the link information handy, switch to your preferred image map tool/website
In this example we explain the procedure using image-map.net
- Open the domain and choose a picture from your PC or load a picture from a website into the generator
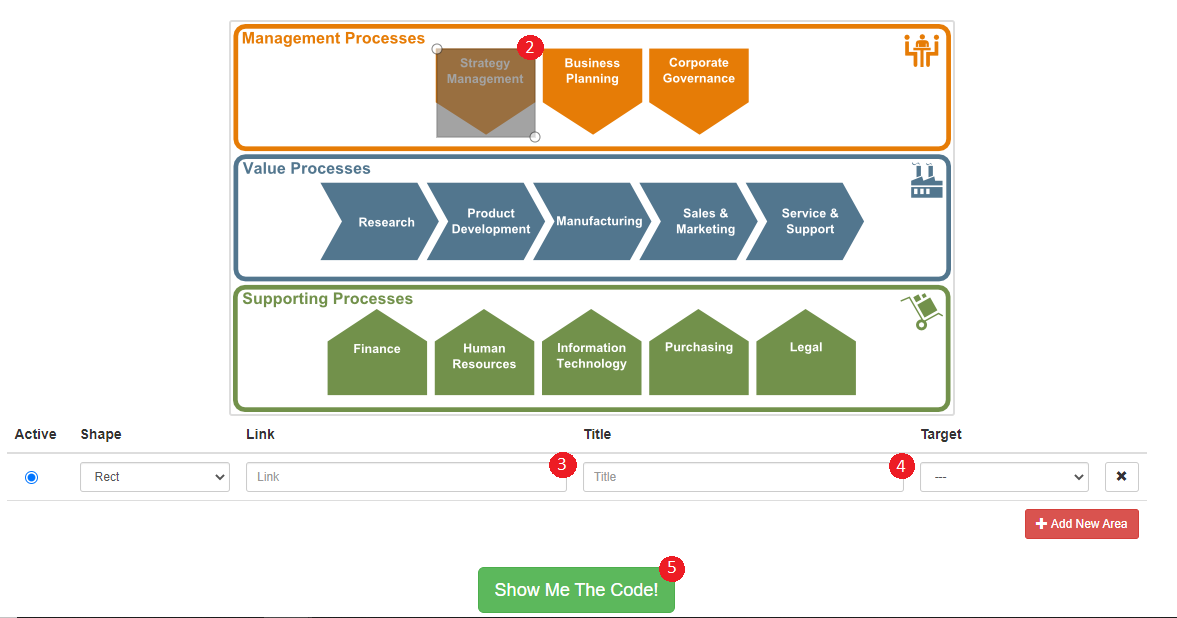
- After you see your image, choose the shape for the clickable area and mark it in your image
- Use the link you saved in the previous step of Stages.
- Optionally you can assign a title. You can distribute additional areas if you want your image to have more parts to click on.
- Click on Show Me The Code!
- Please copy only the <area…> tags
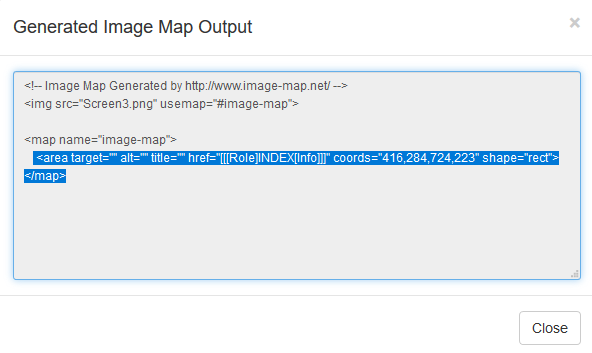
Clean up the image map output
Before pasting the image map output in image map, it requires some clean up. Copy the output in a clipboard and follow below steps:
- Manually delete the target=“”
- Make sure \, [,],:,# characters are escaped correctly inside the link e.g.
- href=“[[www.testurl.com/y=123[abc=#3:2]def]]” –→ “[[www.testurl.com/y=123\[abc=\#3\:2\]def]]
- href=“[[[Role]ProjectManager\3]]” –→ href=“[[[Role]ProjectManager\\3]]“
This clean up image map output is now ready to be pasted in the image map box in high level step 2 mentioned at the beginning.