This is an old revision of the document!
Modeling a Process
Modeling a process enables a clear and consistent definition of processes. It also helps to eliminate redundancies and identify inefficiencies. Since the processes are stored and updated under one umbrella, Stages provides a central hub for the entire organization to use and review the modeled processes.
Below you can find the description on how to model a process within Stages. Before you begin modeling, understanding the process content and modeling guidelines is crucial to building good processes.
For our demonstration, we are modeling the ‘Requirements Management’ workflow in the ‘Software Engineering’ workspace.
Workflow
Select the right workspace where you want to model your process and click or tap on Process. You will see the following element types under Process: Workflows and Activities, Work Products, Roles, Phases and Milestones and Guidance. To begin modeling, click or tap on Workflow and Activities.

In order to add a new workflow, you can either click on ‘Add Workflow’ or + symbol.
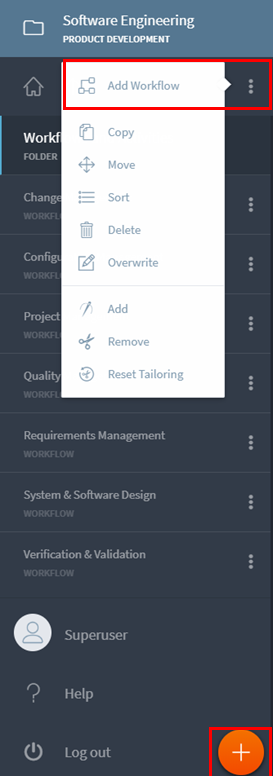
Note: Make sure you have selected ‘Modeling’ view, to enable viewing of modeling elements.

Activity/Decision
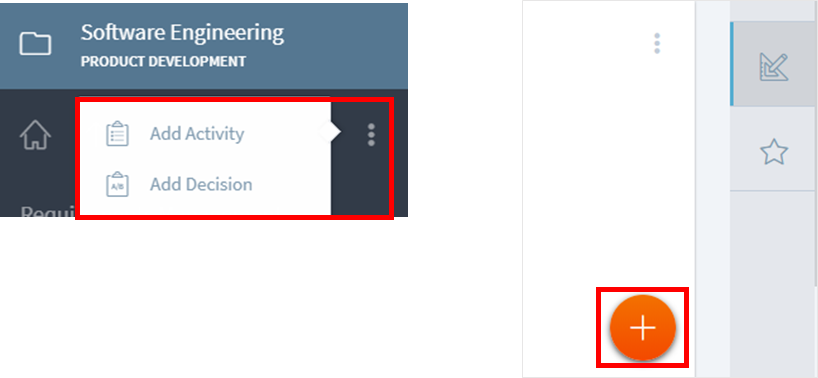
Next, click or tap on workflow you created. Once you are in the workflow, you can a new activity /decision by either clicking or tapping (a.) ‘Add Activity’ or ‘Add Decision’ or (b.) + symbol.
Option (a.) allows you to create one activity at a time.
Option (b.) allows you to create one or more activities at a time which are already associated with each other.
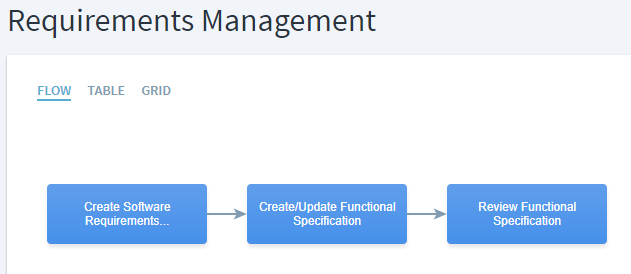
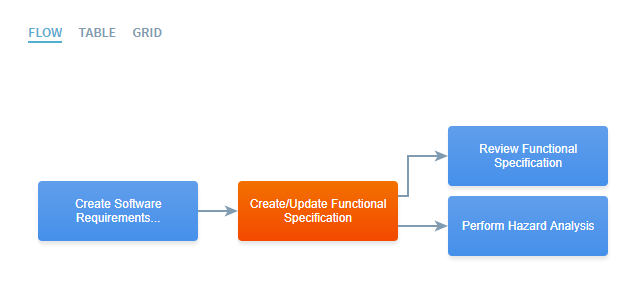
For our example, we are creating three activities within ‘Requirements Management’ workflow using option (b.). As seen from flow diagram, all the three activities are created at one go and already linked to each other in the sequence they were created.
Tooltip: Instead of clicking on ADD ONE MORE, you can hit on ‘Tab’ key on your keyboard to do the same.
Activity/Decision as Predecessor or Successor
You can model an activity /decision by clicking on the box. This will provide widgets below the diagram to model that specific activity/decision. Click on Add Predecessor or Successor under Sequence widget to add an associated activity /decision.
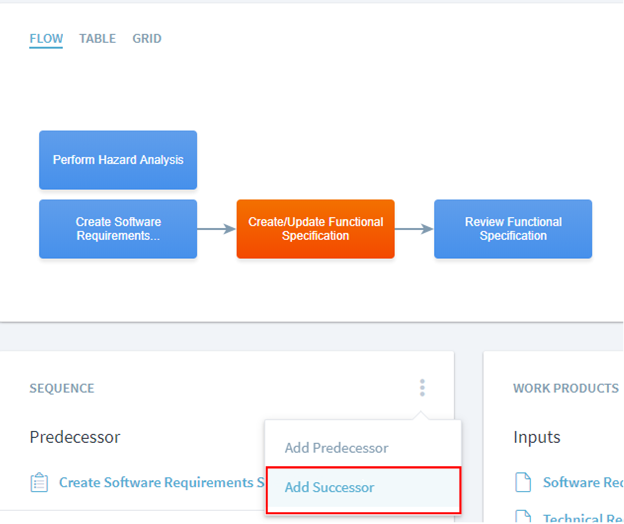
In our example, we created another activity called Perform Hazard Analysis using above step.
Adding Elements
Once you have selected the activity /decision, you will find widgets to add work products, roles, phases, guidance below the diagram to model it. The steps to do the same are similar for each of them as described in Step 5.
Click or tap on three dots to show the relevant options for action you wish to perform.
We have mapped the process elements like work products, roles, phases to each of our activity using above step.

Editing/Deleting Elements
Once you have added the process element of your choice, you can edit comment or delete the selected option (e.g. output called functional specification in our example) by clicking on the three dots.

Description and Attributes
Use the pencil icon to make edits to description or update the flow start/end point (attribute) of your activity /decision
Sorting
The steps to sort workflow and activity /decision is the same. For workflow, you will navigate to Workflow and Activities by clicking on it. Then choose ‘Sort’ by selecting the three dots as shown for our workspace ‘Software Engineering’.
You can sort based on A-Z or custom sort by dragging a specific workflow by clicking on it and moving it up or down.

If you wish to sort activities /decisions within a workflow, click on the specific workflow and click on three dots to select ‘Sort’ option and use above steps to sort activities and decisions within a workflow.
Moving
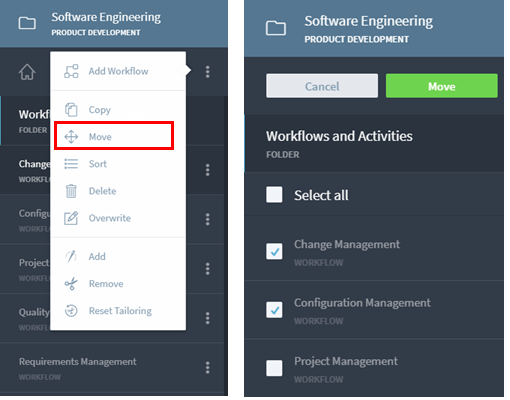
The steps to move workflow and activity /decision is the same. For workflow, you will navigate to Workflow and Activities by clicking on it. Then choose ‘Move’ by selecting the three dots as shown for our workspace ‘Software Engineering’.
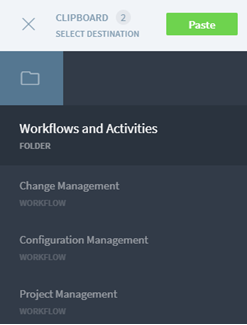
Select the workflow you wish to move, click on ‘Move’. Navigate to the workspace or workflow, where you wish to move the selected workflows and click on ‘Paste’.
If you wish to sort activities /decisions within a workflow, click on the specific workflow and click on three dots to select ‘Move’ option and use above steps to move activities and decisions from the given workflow to workflow of your choice.