Model process content
This section assumes that you are already familiar with navigation in Stages and understand process content. It is also assumed that you are starting with an empty workspace
Click the process icon on left-side menu which directs you to the process home menu to begin. You can access a folder by clicking the specific folder on the left-side menu or on the bottom of the process home menu.
Model a New Process from Workflows and Activities
Modeling a process from the Workflows and Activities folder is the most convenient method due to the inclusion of all components of the metamodel. First, click the “Workflows and Activities” folder. Click the orange plus sign icon then “WORKFLOW” on the left-side menu to add a new workflow. Next, type the name of the workflow and hit enter/return.
Activity (Successive Events)
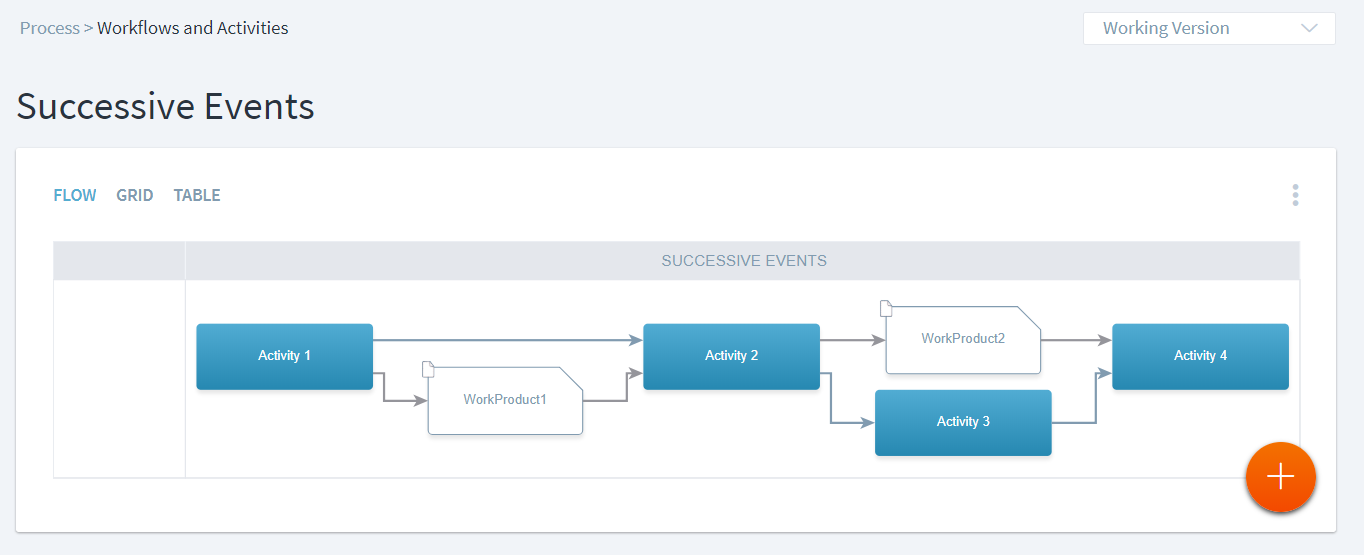
Adding activities in a successive order allows the user to see the progression of steps that need to be completed in order. This method allows activities to be added before/after others.
For this method, you need to be in the modeling setting.
Steps:
- Click the orange plus sign in the process visualization area to add an activity.
- Click “ACTIVITY” and type in the activity name.
- Save by clicking “Save” or hitting enter/return.
- Add Activities
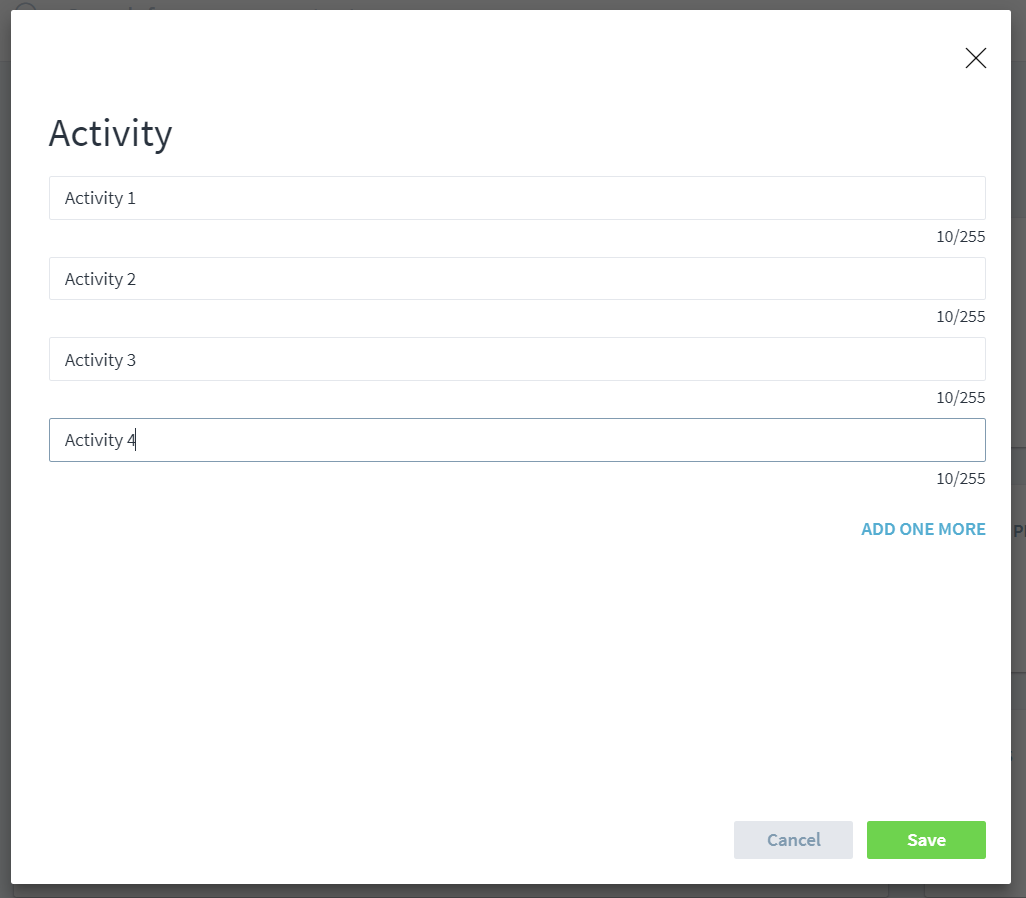
- From an individual activity you can either click the orange plus sign in the flow area or click the three dots in the activities area. For the most convenient method, we suggest clicking the orange plus sign. Once clicked, a popup menu will show “ADD SUCCESSOR ACTIVITY” and “ADD SUCCESSOR DECISION”. Click the activity option. A pop-up menu appears where you can enter an successor activity. If you want to add multiple activities you can click “ADD ONE MORE” or you can simply hit Tab, which will lead the system to add another line for you to type in an activity. This creates a string of activities in order. You can manipulate or change any of the events order by going into the activities section and clicking the corresponding three dots.
Work products can be added to activities in this method also. (See below)
Activity (Work Product Based)
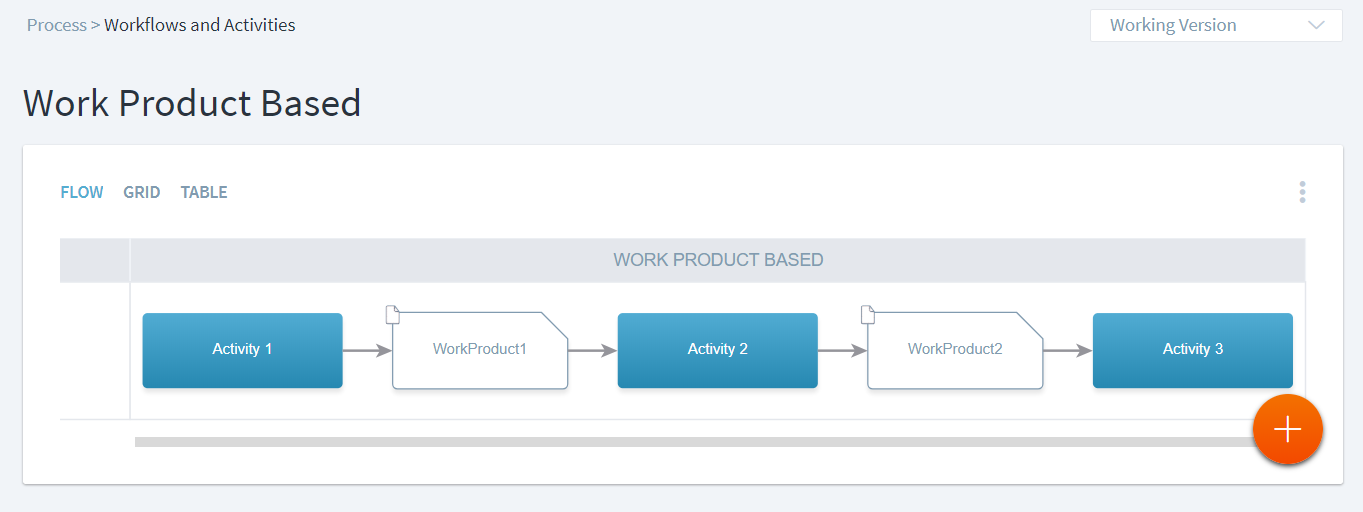
If you want to create a string of activities based on work products (inputs/outputs), this method is for you. This method allows you to add activities and work products along side each other. This is a good method if you want to see what you need to complete/produce during each activity.
You can be in either viewing or modeling mode for this method.
Steps:
- Click the three dots on left-side menu and click “ADD ACTIVITY.”
- Type in all of the activities, hit enter/return after each one.
- The activities show up in a vertical column with no connections.
- Click a specific activity that was just added.
- Click the three dots at the top-right of the Work Products section.
- From here you can create inputs or outputs of the activity. Select “Add Inputs” or “Add Outputs” next. Clicking either of them allows you to type the name of the input/output or to browse other inputs/outputs. When typing the name, the drop down menu comes up with other inputs/outputs from your workspace, an option to “Create”, and “Create comment”. Select “Create” after typing in the name of your input/output. As soon as the input/output is created, it will show up on the flowchart or table.
Roles
Click the three dots in the top-right of the Roles section to add a role to the activity or workflow. The five RASIC roles appear, click “Add Responsible” to assign the responsible role. You can either browse roles in your workspace or type a role in the bar.
If the process is project- or program-specific you can assign roles to users.
Phases
Click the three dots in the top-right of the Phases section to add a phase to the activity or workflow. Click “Add Phases”. You can either browse the phases in your workspace or type a phase in the bar.
Guidance
Click the three dots at the top-right on the Guidance section to add guidance to the workflow or activity. Six add options appear; practices, tools, trainings, templates, checklists, and files. Selecting one of these allows you to input guidance by typing or browsing.
Other Ways
The process model can be viewed from any perspective: activities, work products, roles, phases, and guidance. You can add/edit actions through any of the different roles, phases, etc. The way to do this is the same as going through “Workflows and Activities” except you will assign roles, inputs/outputs, etc. to a different parameter.


